Libraries
Libraries are a way you can categorize and verify content
Summary
The hierarchy of content in upgraded Planhat is: Pages are the fundamental building block, and they are organized within (Views in) Sections, which can be grouped into Libraries
Each Library is typically for a department, job role, process or topic
Libraries are typically created and managed by your admins (as opposed to general Planhat users), and the content they contain is verified (recommended)
Libraries are configured, and then their content accessed, via the Content Explorer
Who is this article for?
All Planhat users - to learn about accessing Library content
Planhat admins/builders who configure their tenant for their team (e.g. CS Ops) - to learn about creating and managing Libraries
🎥 Quick video overview
Article contents
Introduction
"Content" - consisting of Pages (which can be Documents, Dashboards, Presentations, Data Tables, Inboxes and more), typically organized in Sections - is a central part of upgraded Planhat (ws.planhat.com). Pages are a key way in which you view and interact with your customer/prospect data. Pages are designed and organized within Planhat by you, enabling a great deal of personalization.
In the hierarchy of content, Pages can be arranged in Views, which are in Sections, and all of that can be located in Libraries. You can read more about these structural concepts in our separate article here.
Libraries are a way in which you:
as a Planhat admin/builder, e.g. CS Ops, can group content into categories for easy identification, and make it "verified" (with a blue checkmark/tick)
as a general Planhat user, can see which content is approved and recommended, and see it in the context of these categories (e.g. use cases)
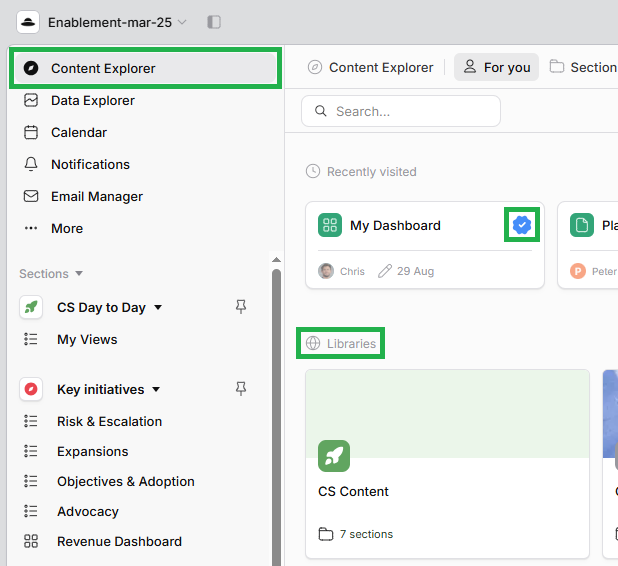
Libraries are located within the Content Explorer.
📌 Important to note
Libraries were previously created and managed via a "Libraries" Global Tool for admins, but that has since been deprecated, and now you set up Libraries in the same place where general Planhat users can access their content: in the Content Explorer.
What are Libraries?
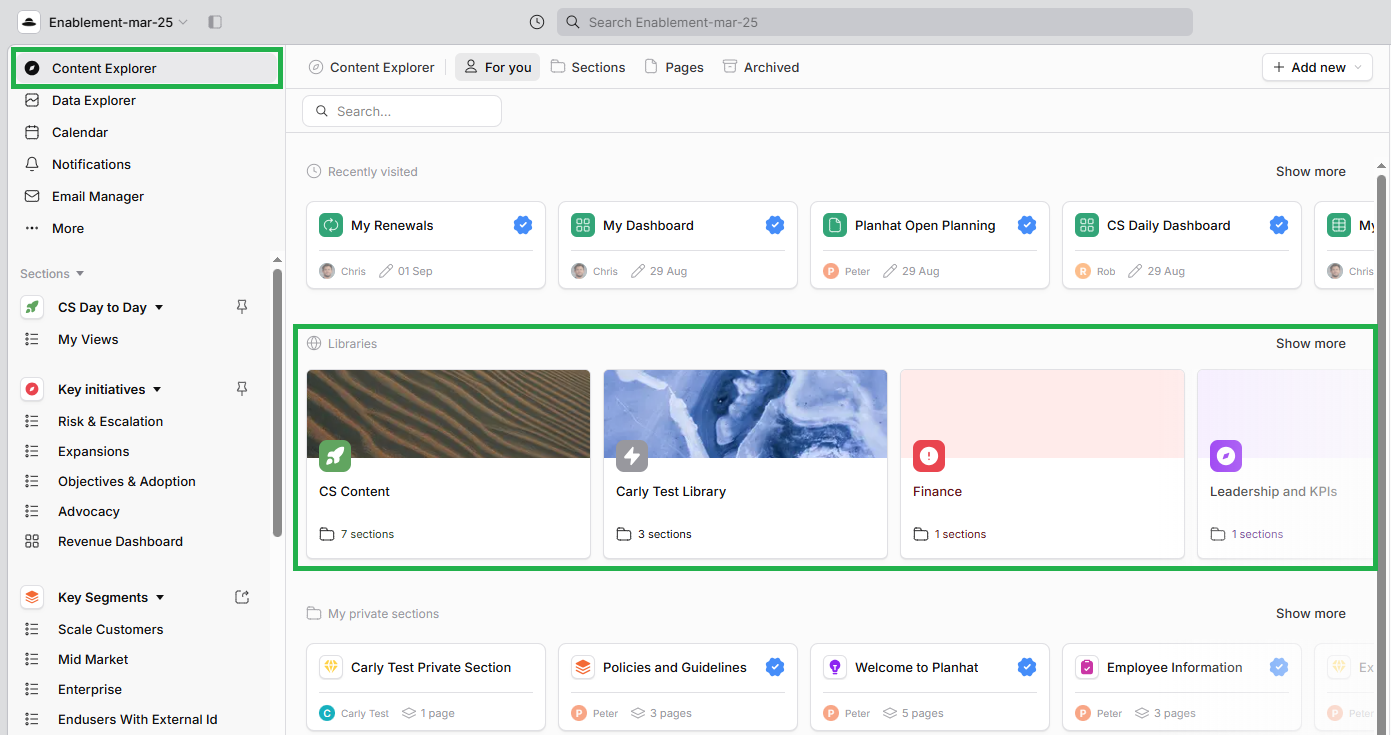
Libraries are collections (a bit like folders) of related content (Pages and Sections). For example, you could have Libraries based on departments or job roles (such as Sales or Leadership), or topics/processes (e.g. Onboarding or Portals).
When you go to Content Explorer (a Home feature) to view content and choose what you would like to add to your Home screen, you will see Libraries displayed under any recently visited content, like so:
Click the image to view it enlarged
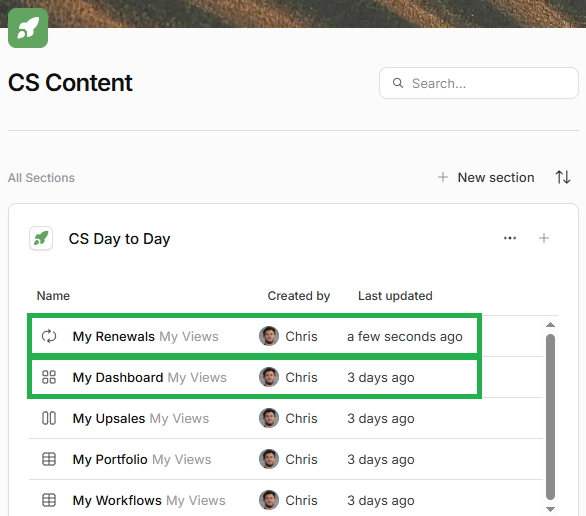
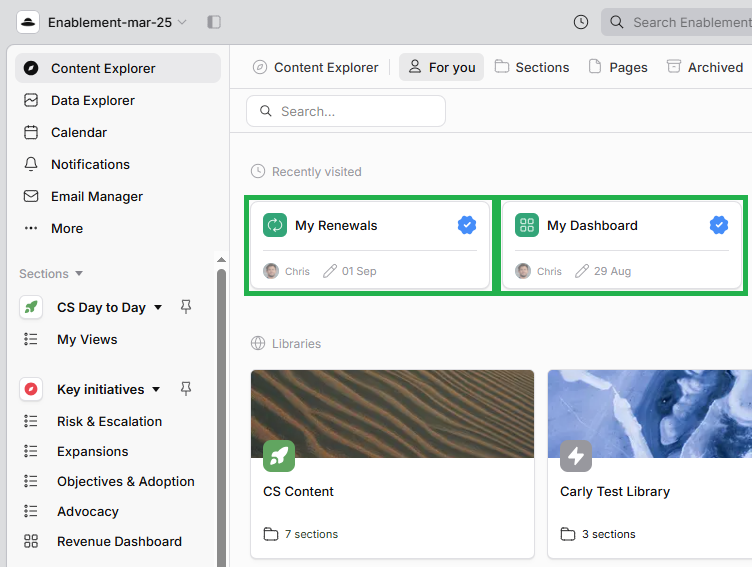
Content within Libraries is "verified" - it shows in the Content Explorer with a blue checkmark (tick) when you view it outside of the Library structure. For example:
Within a Library:
Viewing individual Pages in Content Explorer:
Click the image to view it enlarged
As with other content in Content Explorer, you can click on it to open it up and view it, and then choose whether or not to add it to your Home.
Why use Libraries?
Content (Pages and Sections) don't need to be part of Libraries, so why use them? There are several advantages.
Firstly, they are a layer of structure. As your Planhat tenant will likely end up with a lot of different Pages and Sections, Libraries are a way to group them together into categories, so it's easier for everyone to find what they are looking for.
Next, from the perspective of a Planhat admin/builder, Libraries are one way that you can carry out "top down" customization of your Planhat tenant. Rather than all your Planhat users - including any junior, inexperienced people - creating everything themselves and potentially not following your organization's best practices, using Libraries you have the power to define what's recommended, as what's in a Library is "tagged" as being approved content.
Finally, from the perspective of a general Planhat user, it's clear which Pages and Sections are recommended - the verified content. This helps you choose what's the best content in the Content Explorer, if there are lots of options.
How to create and manage Libraries
🚀 Tip
If you would simply like to know how to access Library content as a general Planhat user, remember that you just need to go to the Content Explorer (positioned in the top right of your Home), and look either at the "Libraries" group (for whole Libraries), or the verified content with blue checkmarks (ticks).
📌 Important to note
The instructions to configure Libraries have changed: in the past, Libraries were created and edited in a "Libraries" Global Tool for admins, but this has since been deprecated. See below for the updated instructions.
📌 Important to note
When creating/editing a Library, you can give specific access levels to everyone in your tenant or chosen named Planhat users, which we discuss later in this article.
In addition to this, there are a couple of workflow permissions in Roles that affect access to Libraries:
"Library Manager" (which you will see mentioned in the UI when configuring Libraries, as discussed later in this article) gives users the ability to create Libraries and view/edit all Libraries in the tenant
"Content Super Admin" is a wider-reaching permission, which gives access to all content (including Pages and Sections in Libraries and Portals)
In other words, at time of writing there is overlap between these two permissions - both (independently) give full access to Libraries, with "Content Super Admin" also including additional functionality as well
You likely don't want either of these permissions enabled for all Roles - e.g. you may enable "Content Super Admin" on the Administrator Role and "Library Manager" on the Manager Role
Creating a Library
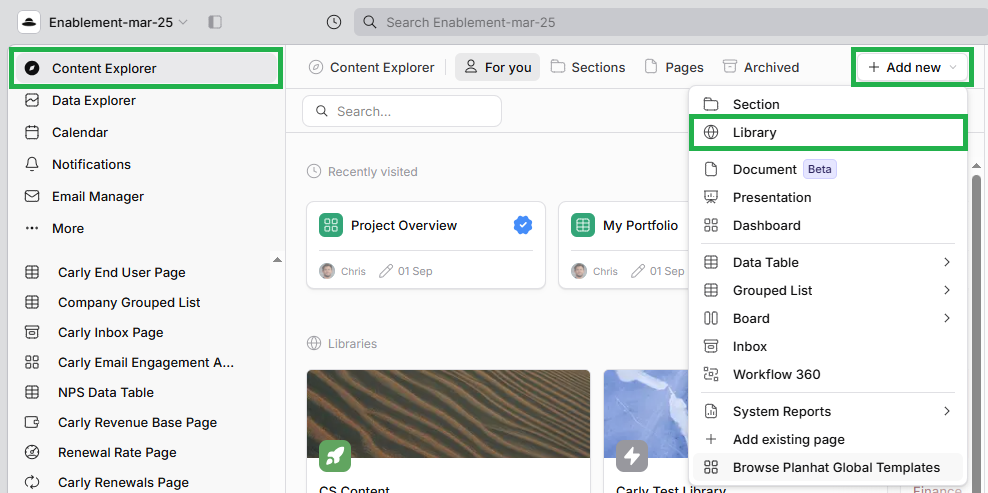
To create a new Library, simply go to Content Explorer, click "+ Add new" in the top right, and select "Library" from the dropdown menu.
Click the image to view it enlarged
This will open up a modal like this to complete:
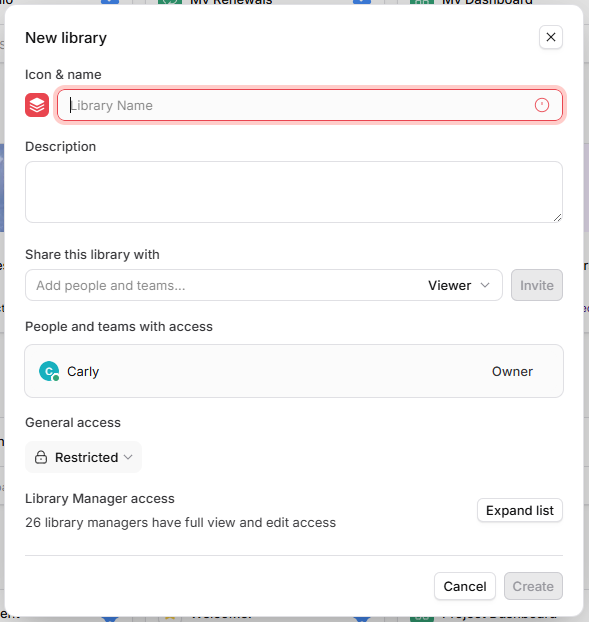
Choose an icon (comprising a color and a picture) for your Library, and give your Library a name. Make sure it's clear what the theme of your Library is (e.g. "Sales Content"), and ensure its icon is different from existing Libraries in your tenant to make it easier to distinguish between them.
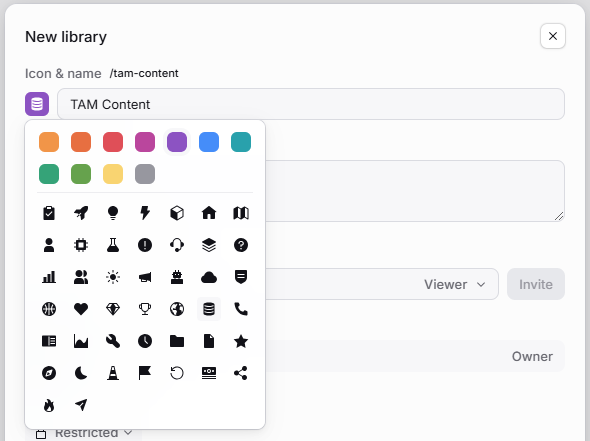
Optionally, add a "Description" with additional information.
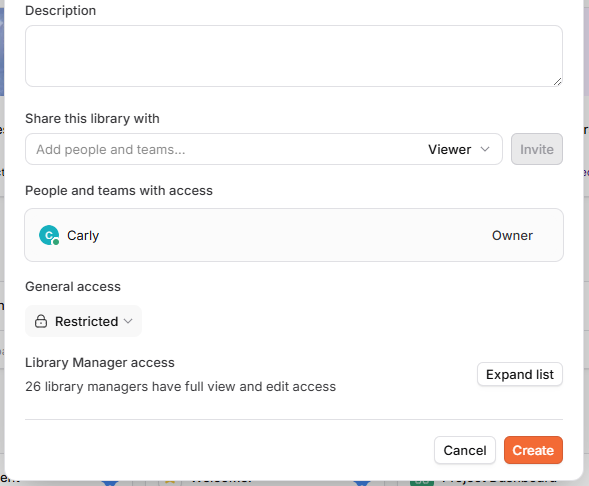
The next part of the form is where you define access to the Library.
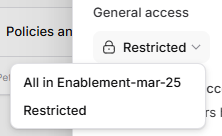
Similar to how you can share Pages and Sections, you can give access to this specific content in two alternative ways:
Once you've filled in the form and clicked "Create", you'll start with a blank slate:
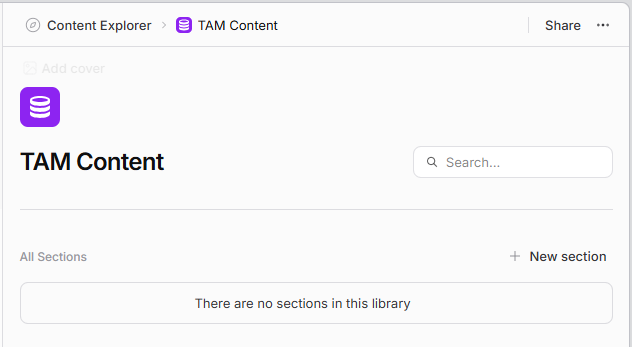
You begin by adding a Section (remembering that Sections contain Pages, arranged in Views). Click on "+ New Section" (shown on the right in the screenshot above). You have three options (dropdown shown below): creating a new Section, adding an existing Section, or selecting a "Planhat Global Template" (Section Template).
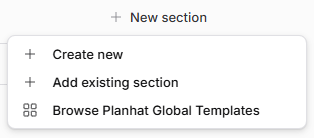
Repeat this to add more Sections as desired.
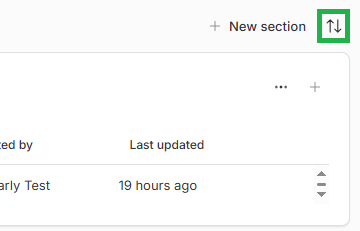
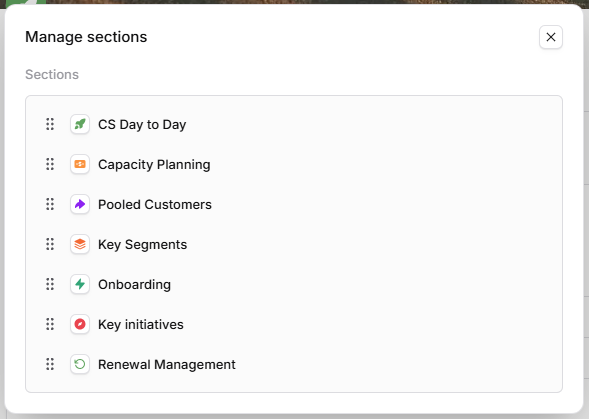
You can change the order of Sections if you like - simply click on the up/down arrows, and then "drag and drop" the Sections (by clicking and holding on the icon of six dots next to the relevant Section).
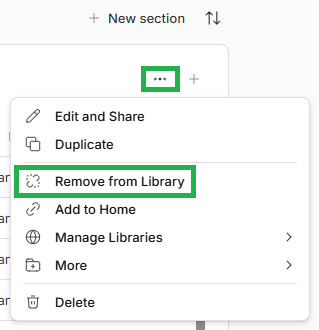
If you change your mind and would like to remove a Section from a Library, click the ellipsis symbol and then "Remove from Library" (not "Delete", as that would completely delete the Section - you'll see a pop-up that warns you of this if you click it).
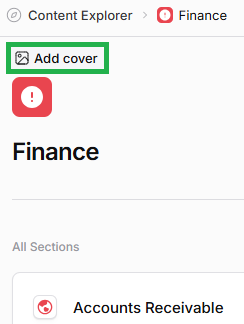
Editing an existing Library
To edit an existing Library (assuming you have the necessary permissions), you can click on the Library in the Content Explorer to open it and then configure it (e.g. add/move/remove Sections).
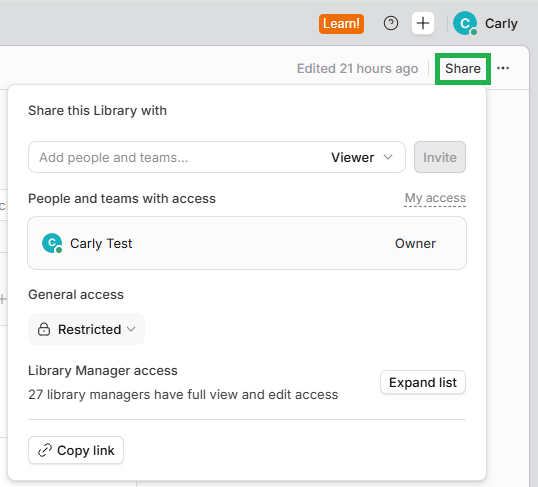
To change access levels for the Library, click on the "Share" button in the top right.
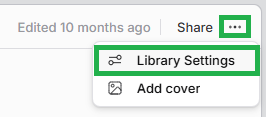
If you would like to edit the Library name, icon or description, click on the ellipsis in the top-right corner, and then select "Library Settings".
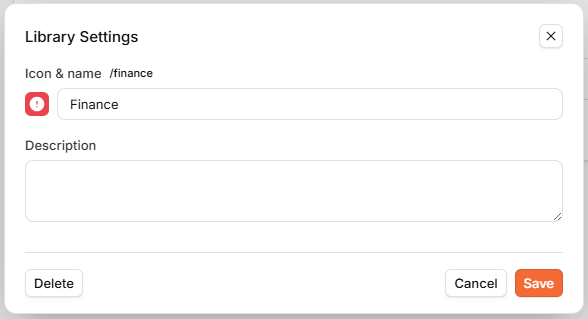
(This is also where you can delete a Library, by clicking "Delete" in the bottom left of the modal shown above. You will see a "are you sure?"-type pop-up before the Library is actually deleted, in case anyone clicks this without realising the consequences.)