Adding and managing Planhat Users (colleagues)
How to create and edit Users (teammates) via the "Settings" Global Tool
Summary
The Planhat "User" model corresponds to users of Planhat - i.e. you and your co-workers, working in your Planhat tenant
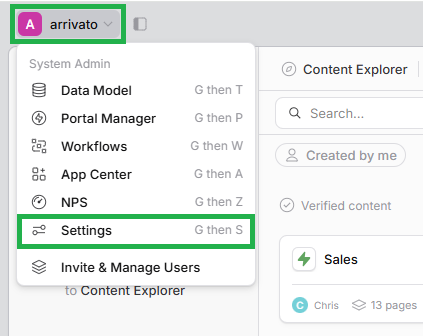
You can add and manage Users via the "Users" part of the "Settings" Global Tool (which you can find in the "System Admin" menu)
When you create a new User, you need to assign them a User Type (e.g. "Core"), and specify an appropriate Role that sets their permissions
You can change User Type after User creation
Who is this article for?
Planhat builders/admins (e.g. CS Ops) who manage Planhat for their organization
Potentially HR professionals, if they manage Users within Planhat
Article contents
Introduction
📌 Important to note
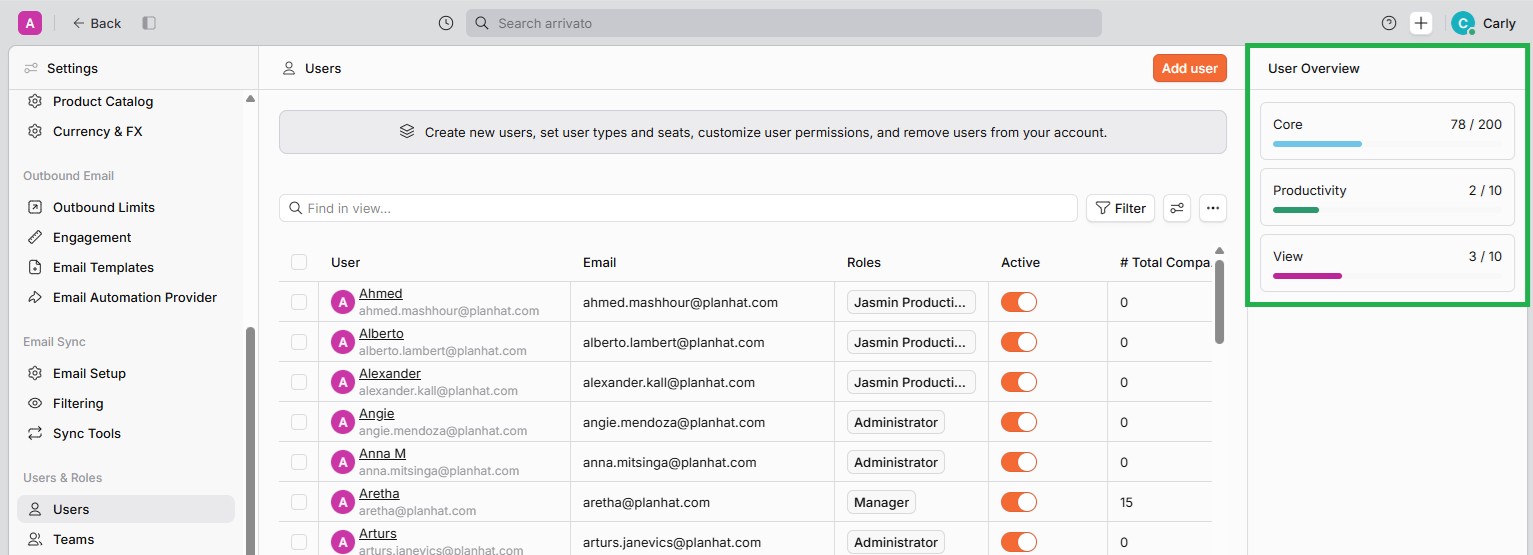
At time of writing, you may have a Planhat plan/contract either with or without User limits. If your specific Planhat tenant does not have User limits (limits of User Types), then you will not see the "User Overview" panel (showing proportion of limits used) pictured on the right of the screenshot below.
In Planhat, you and your colleagues/co-workers are records of the "User" model - corresponding to users of Planhat. You may also see Users referred to as "Team Members".
(Note that this is different from the End User model, which corresponds to people belonging to "Companies", which are your customers and prospects.)
You can add and manage Users within the "Users & Roles" part of the "Settings" Global tool for admins.
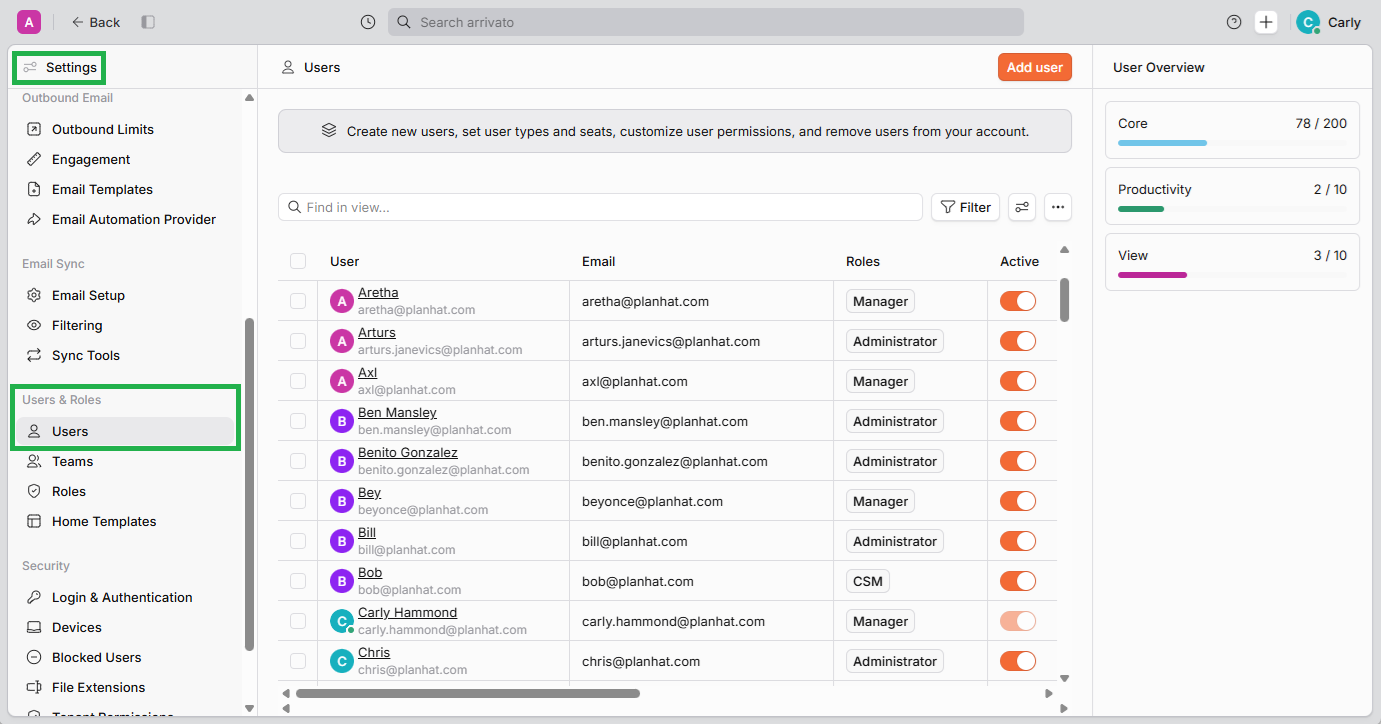
Click the image to view it enlarged
When you add a new User, you assign a User Type (out of "Core", "Productivity" and "View") and a Role (such as "Administrator" or "CSM"). You can only assign Role that's suitable for the User Type you've given that User - meaning that all the permissions align correctly.
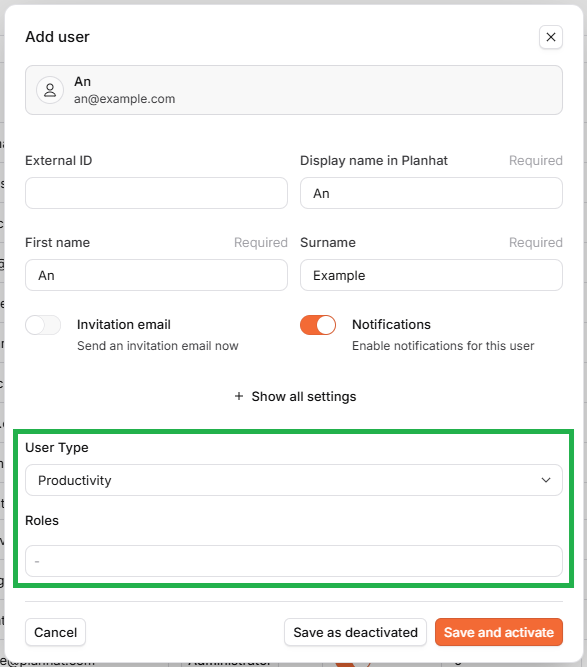
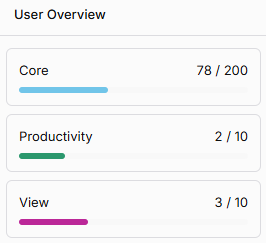
Within your User Overview in the "Settings" Global Tool, you can see how many of each User Type you have available to assign. (This applies only if your particular Planhat contract/tenant has User limits; if you are on a legacy plan without them, then at time of writing you will not see this display.)
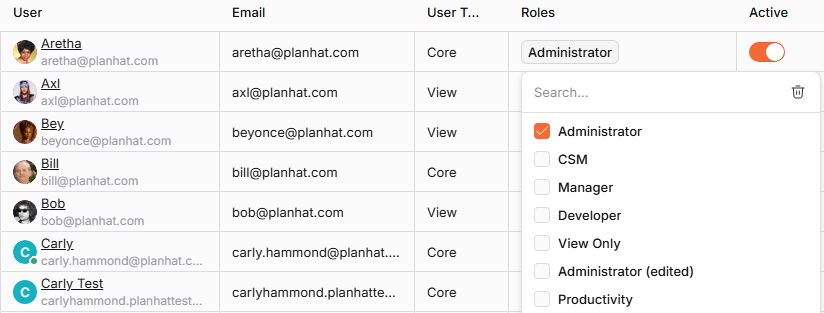
You can also easily edit Users from this main screen - e.g. change Roles for a User.
In this article, we'll take you through where and how to add and manage Users.
📌 Important to note
There was previously the concept of a "Service Seat" to give access to PSA / Professional Services / Service Delivery functionality, but Seats were deprecated in July 2026.
Core Users and Productivity Users can now access PSA/Service features, if your organization has purchased access to PSA/Service.
How to add a new Planhat User
To add a new User (teammate) to your Planhat tenant:
Limits
📌 Important to note
At time of writing, you may have a Planhat plan/contract either with or without User limits. If your specific Planhat tenant does not have limits of User Types, then you will not see the "User Overview" panel (showing proportion of limits used) pictured on the right of the screenshot below.
The maximum numbers of Users of each Type are specified in your contract, and set within the "Admin Settings" of your Planhat tenant by Planhat staff ("Super Admins").
You can check how many of each Type you have available via the panel in the right-hand side of your Users view.
Click the image to view it enlarged
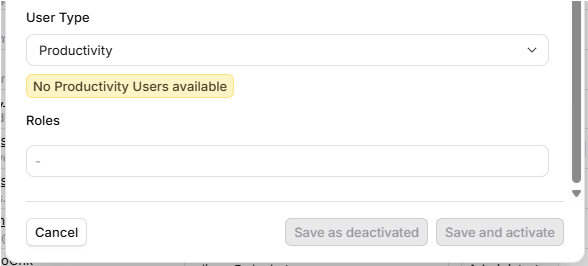
When you're creating a new User, if you try to assign a User Type where you have already used up your allowance, you will see a message in the app informing you of this (see example below), and you will be unable to save/create the User.
Managing existing Planhat Users
Within the "Users" part of the "Settings" Global Tool, you can view all your Users in a table form, and you can make changes to existing Users, both individually and in bulk.
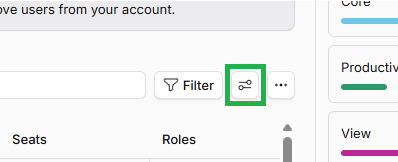
Like other data tables, you can customize which columns are shown here (via the slider icon).
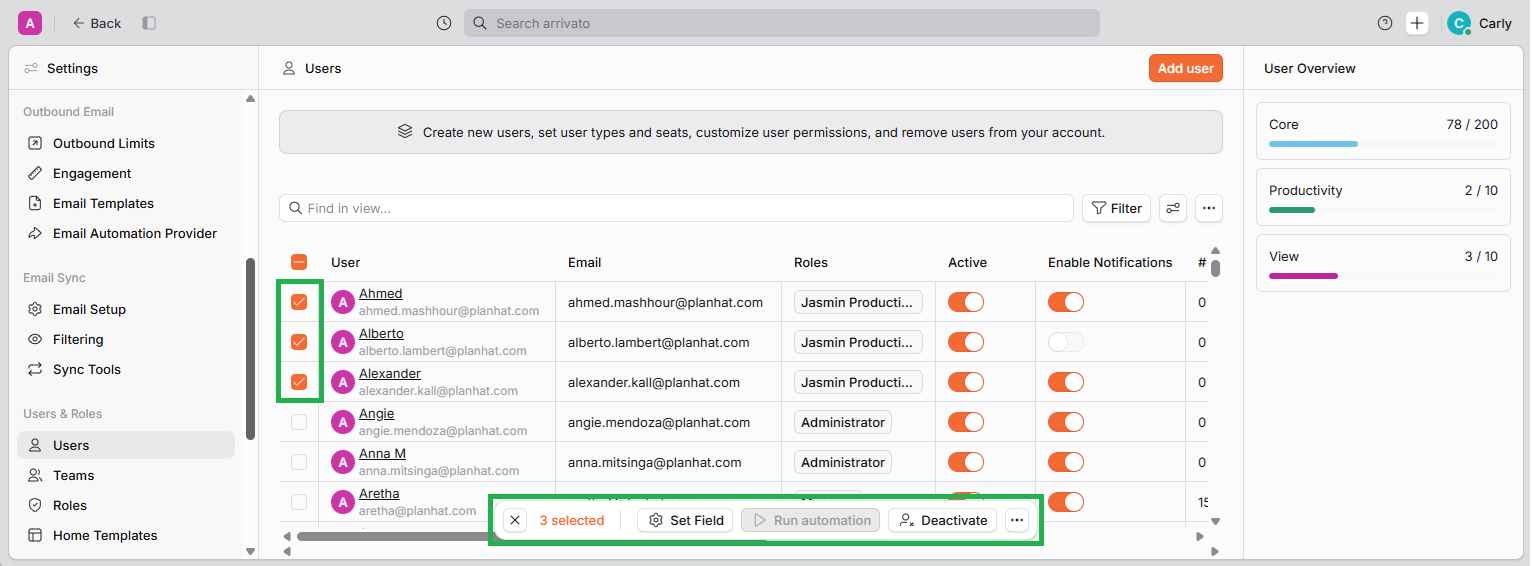
You can use the toggle switches to activate/deactivate Users, and enable/disable notifications. You can also activate/deactivate multiple Users in bulk (as shown in the screenshot below).
Click the image to view it enlarged
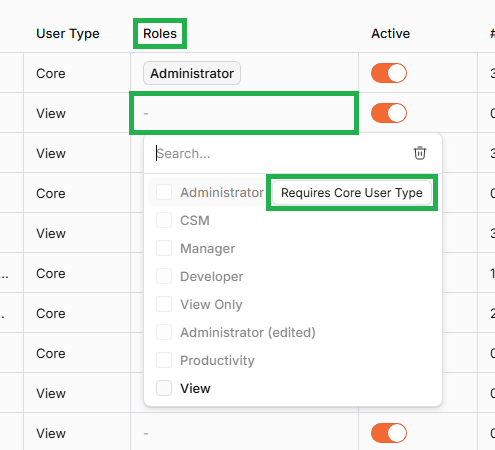
To change the Role of a User, you can click on the Role for that User in the table, and it will open up a dropdown where you can deselect/select Roles via the checkboxes. As we saw above for new User creation, you will not be able to assign a Role if that User has a User Type that isn't sufficient - Roles that aren't suitable are shown grayed out in the list, and if you mouse over one it will tell you why it's not applicable, like in the example screenshot below.
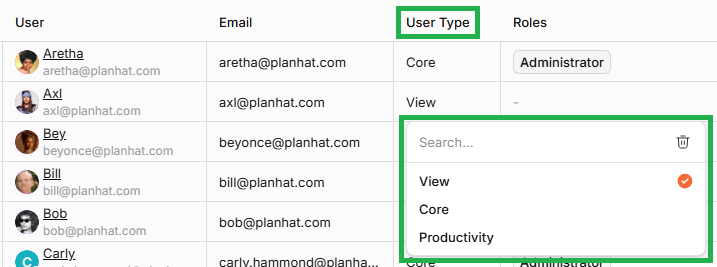
You can show User Types as columns here too, and you can make changes to these properties directly in the table. Like when you're creating a new User, you won't be able to assign a specific User Type if you have already used up the allowance - it will be grayed out in the list.
Viewing User Full-Page Profiles
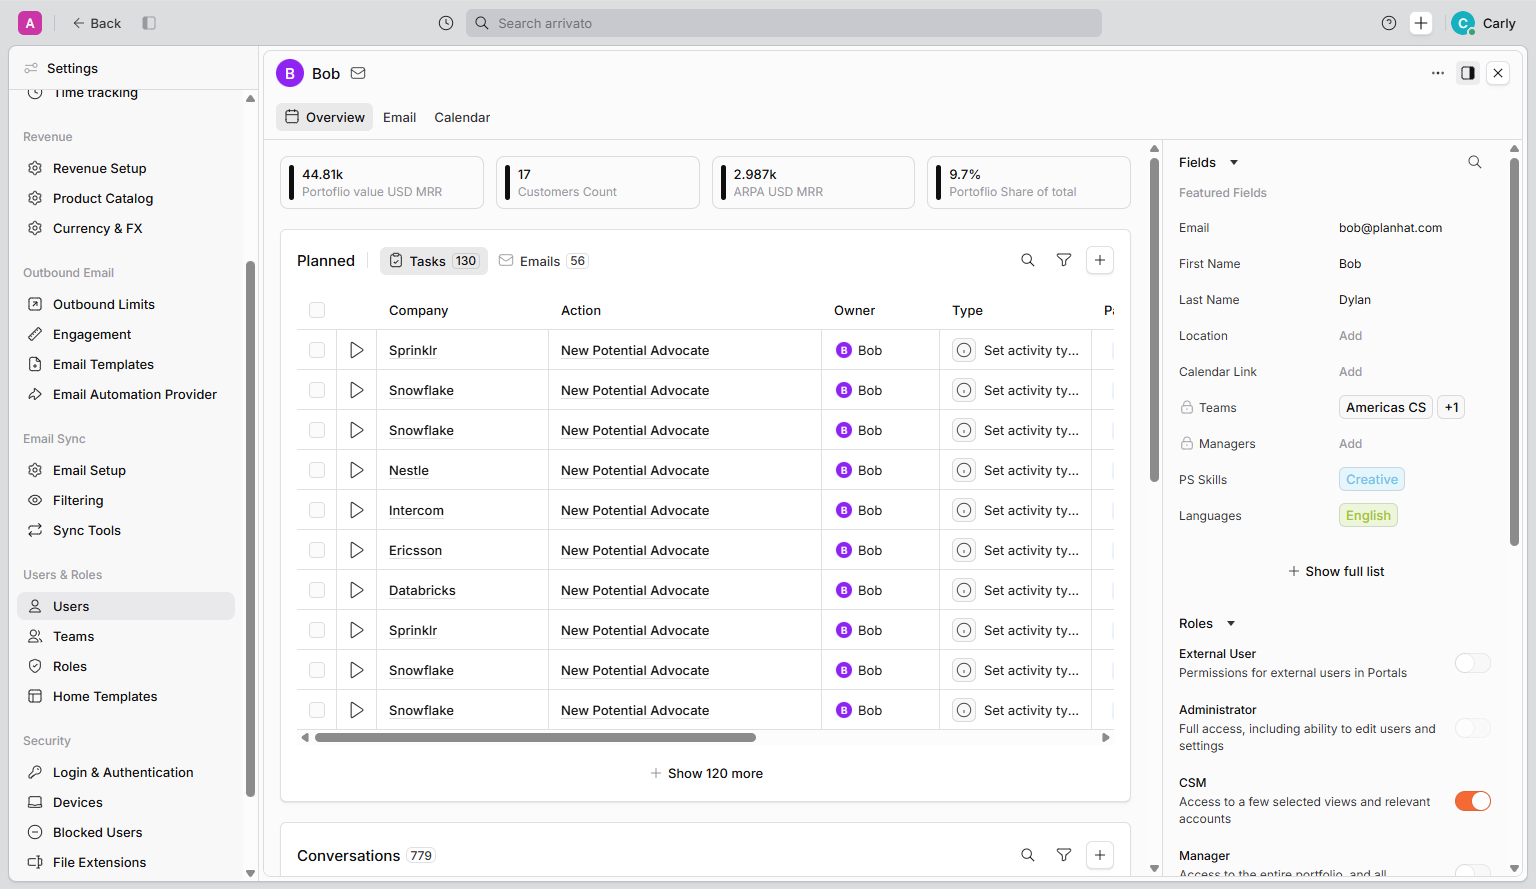
From this table you can also go to each User's Full-Page Profile, where you can see/edit further details about the User.
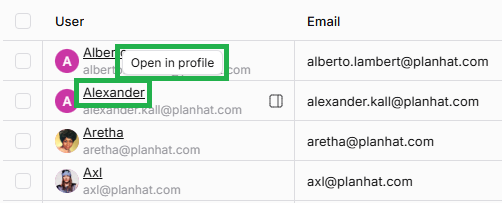
To navigate to a User's Full-Page Profile, you click on their name in the User column (tooltip: "Open in profile").
This will open up the User Full-Page Profile like so:
Click the image to view it enlarged
Here you can view additional information, such as tasks and emails associated with that User, as well as make change to the User fields/properties.
Additional resources
You can optionally assign Users to (custom) Teams, such as the EMEA CSM Team, or the Sales Team, or the Leadership Team, and so on. You can then use these Teams in different places in Planhat, e.g. in filtering. You can read about Teams here.