Portal content
You can create Sections and Pages for Portals via the Portal Manager, or in Home and then share to Portals using your choice of method
Summary
"Content" in upgraded Planhat (ws.planhat.com) refers to Sections and Pages. As well as these existing in your Home, they are the main components of Portals
Content in Portal Manager ("Content" part) can be added to Portal Templates or individual Portals
You can create content for Portals via the Portal Manager, or you can share content from your Home to Portals in a variety of different ways:
You can make it available in Portal Manager
You can add it to a Portal Template
You can add it to a specific Portal (belonging to an individual Company), either as well as Home or moving it out of Home
Who is this article for?
Planhat users who will be creating content for Portals
It's particularly relevant for Planhat admins (e.g. CS Ops) who are managing Portals for their organization
Series
Portal content ⬅️ You are here
Share Portals with your customers from within your own application
Article contents
Introduction
"Content" is a fundamental concept in upgraded Planhat (ws.planhat.com). You're likely already familiar with content - Pages and Sections - from your Home.
The principles/definitions of content in Portals are the same as Home content:
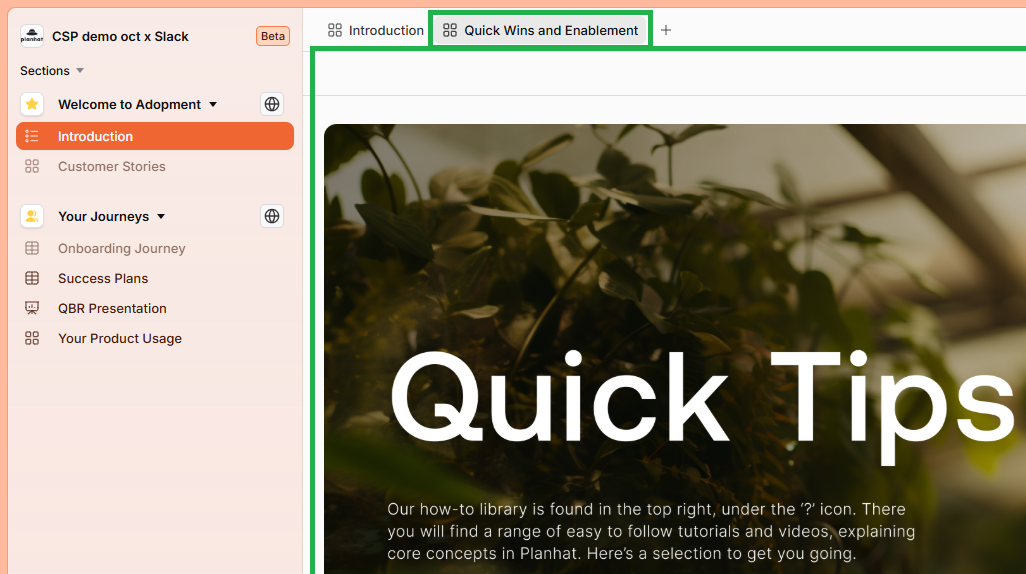
As shown in the examples above, each Portal is quite similar to a Planhat Home. Portal users ("External Users", when we talk about End Users in Portals) will see and interact with Sections and Pages.
When you're starting to set up Portals, we recommend you start by preparing your content - which is the focus of this article.
Typically, once you've prepared your content, you assemble it within Portal Templates, which are similar to the Home Templates you may already be familiar with. Content can also be added ad-hoc to individual Portals to customize them.
Within the Portal Manager, you will find a specific part called "Content", with separate tabs for Sections and Pages.
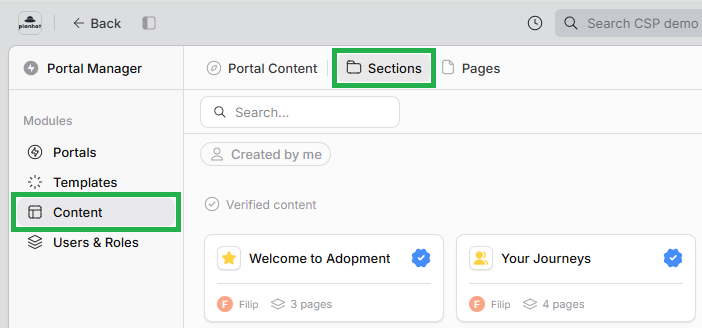
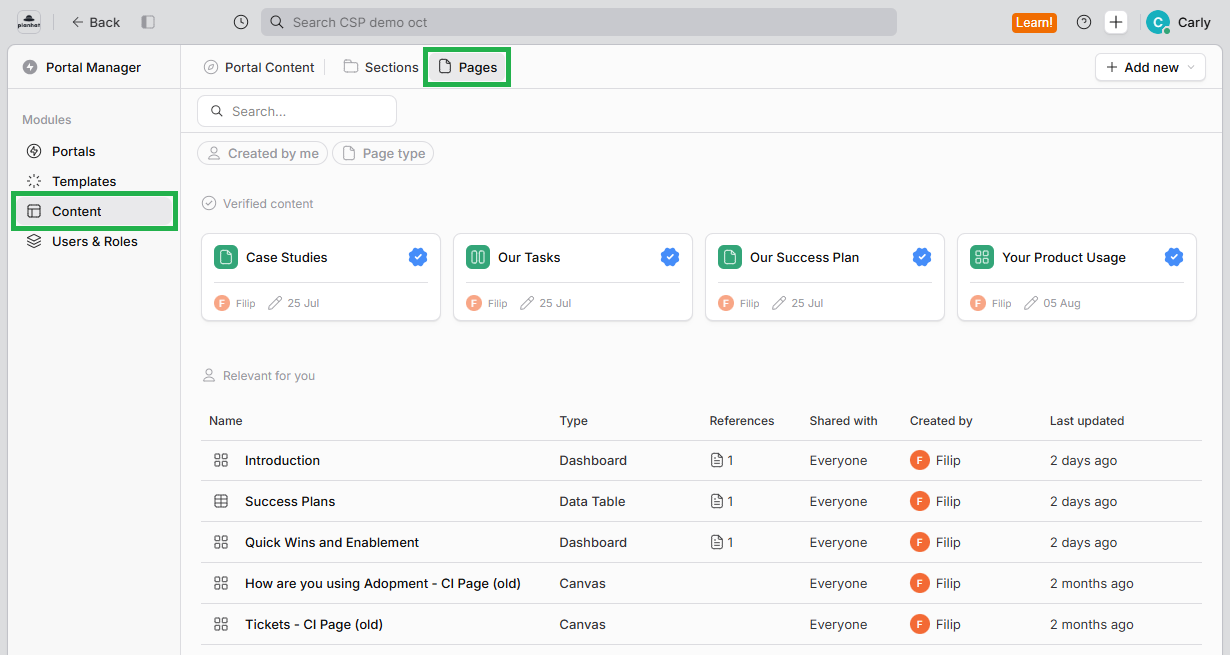
Click the image to view it enlarged
How to create content in Portal Manager
You can create Sections and Pages in Portal Manager, which can then be used in Portal Templates / in multiple Companies' Portals. Creating content in Portal Manager is perfect for when you are designing content specifically for use in Portals - for example, this could be a Section containing Document Pages welcoming customers to their Portal and sharing various training materials such as videos. Note that if you create content containing live data (e.g. a Dashboard Page showing usage of your product), it will be automatically filtered when it is in an individual Company's Portal, so only the data on that Company will be shown.
Where to create content in Portal Manager
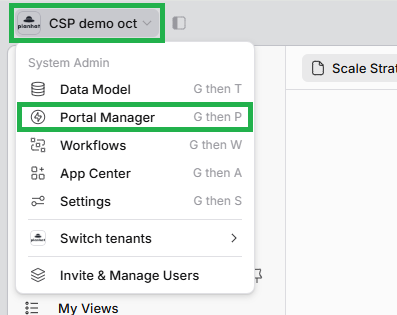
How to create a Section
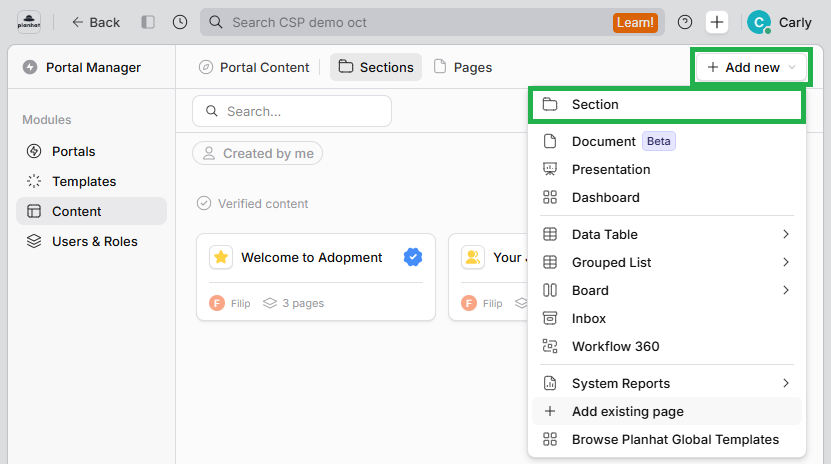
Of course, now you have an empty Section, and you'll need to populate it with Pages - which we'll discuss next.
How to create a Page and add it to a Section
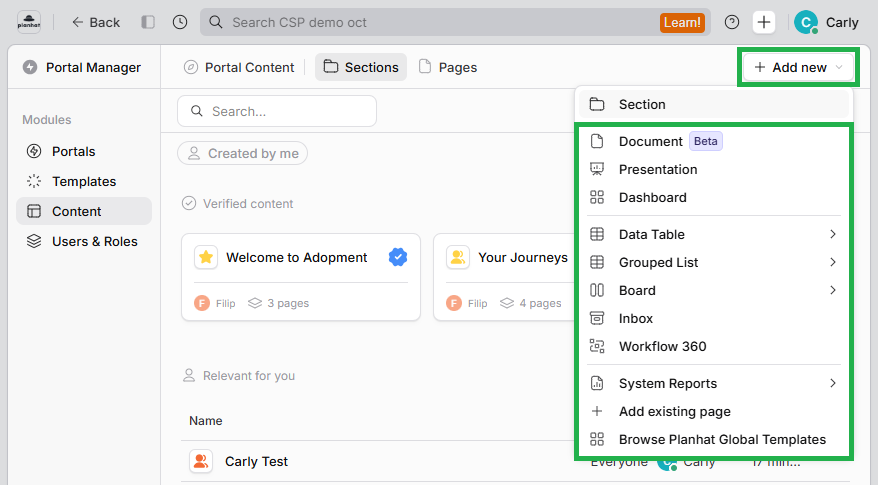
Editing access for a Section
If you would like to edit access for your Section (i.e. change who are Viewers/Editors), then you should click on "Edit and Share".
The main way to do this is to have the Section open (which will be in Home), and then:
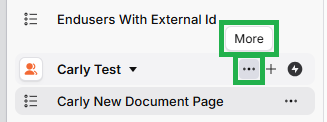
Alternatively, you can click on "More" and "Edit and Share" from the Sections tab of Portal Manager to open up the same editing modal for the Section.
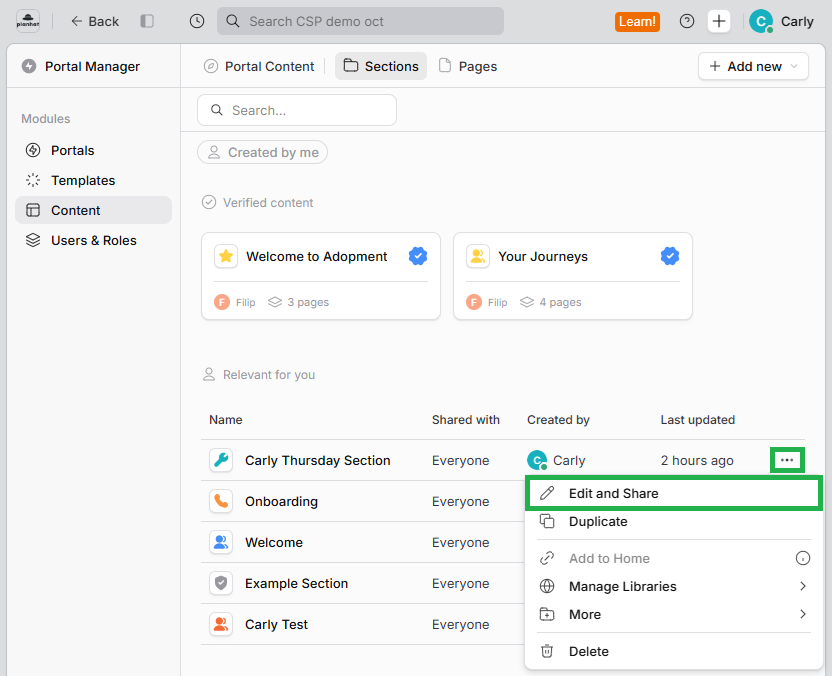
How to make Home content available in Portals
If you've already created content (Pages/Sections) in your Home, you can also make that available for use in Portals. When sharing to Portals, you have different scopes/methods to choose from, depending on whether you want the content to be generally available in Portal Manager, you want to add it to a specific Portal Template, or you want to add it to an individual Portal (belonging to a specific Company).
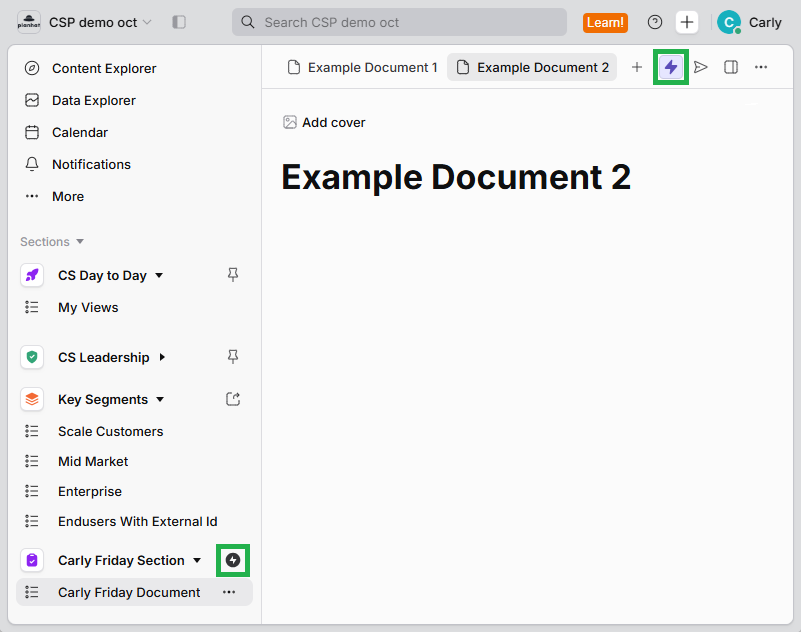
Where to click to share to Portals
In your Home, mouse over a Section name to show the ellipsis symbol (3 dots), and click on that. Select "More" and then "Share on Portal":
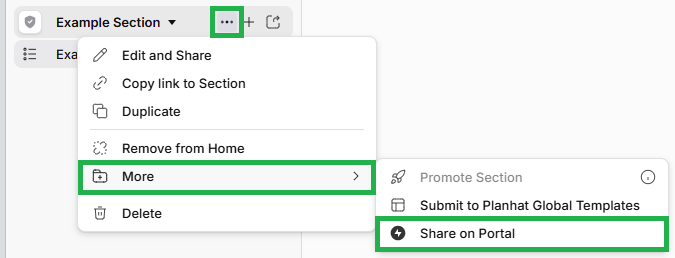
Click the image to view it enlarged
You can do the same with individual Pages too:
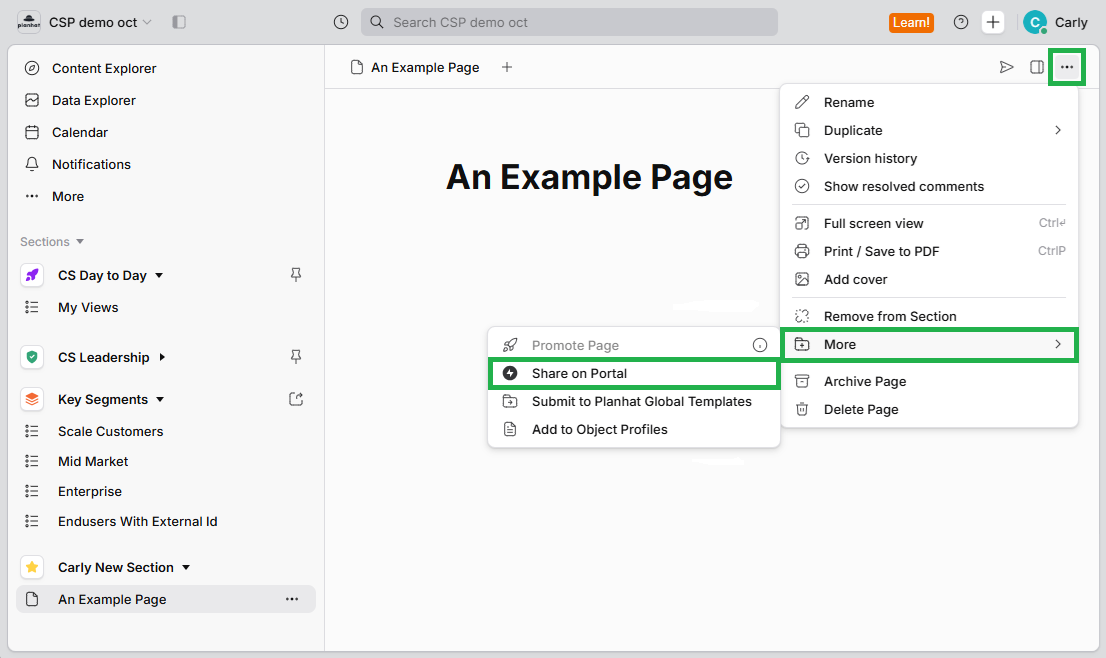
Click the image to view it enlarged
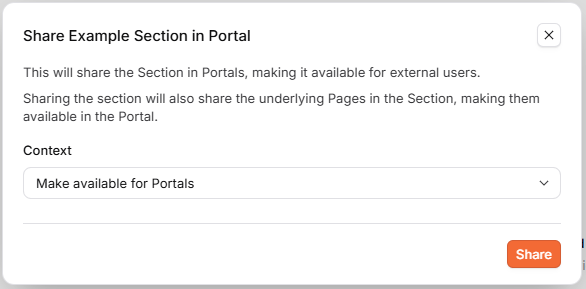
In both cases, this will open up the following modal, with three different options to choose from:
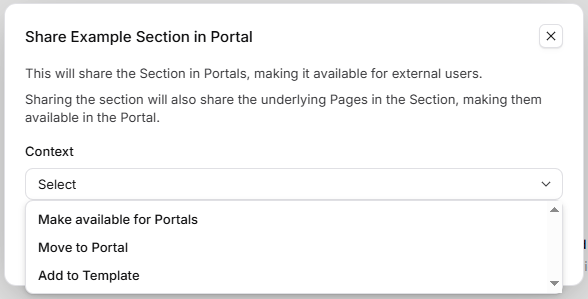
Let's go through each of these options.
Make available for Portals
If you select "Make available for Portals" in the dropdown menu, there is nothing else to configure. Click "Share", and the content will remain in your Home, but will also now be present in the "Content" part of the Portal Manager, meaning it's available for selection in Portal Templates (and individual Portals).
Use this option if you're not sure which Portal Template(s) you'll be adding the content to, or you haven't yet made the Template(s).
Move to Portal
The "Move to Portal" option is referring to adding or moving this content to an individual Portal - that is, a Portal belonging to a particular Company.
When you select "Move to Portal", this will open up another dropdown menu - "Location" - where you can choose a specific, existing Portal.
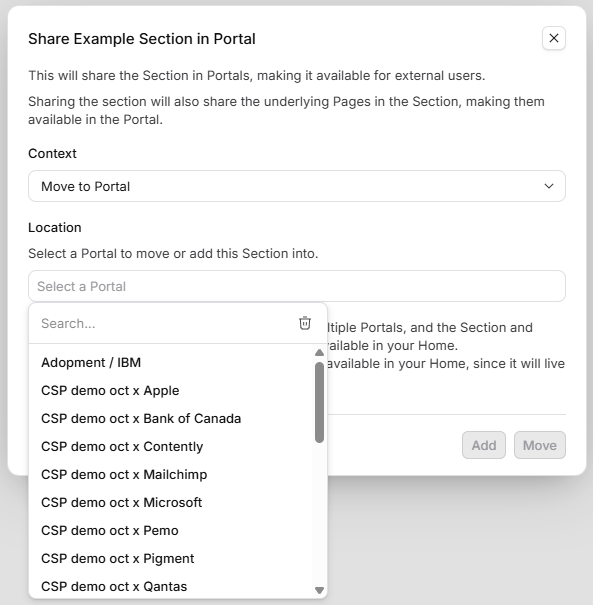
You can use the search box at the top of this dropdown menu to quickly find the Portal you want within the list.
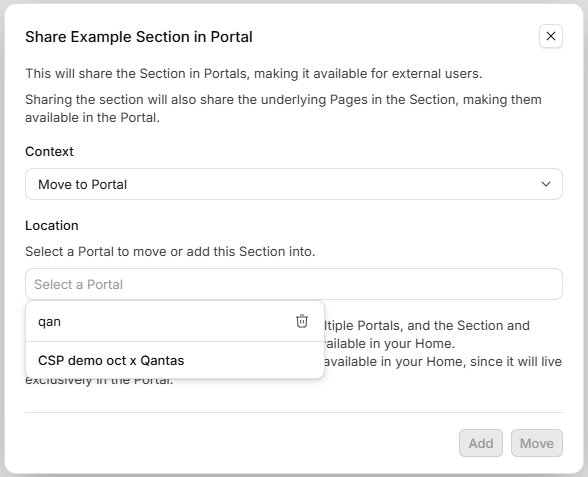
Once you've selected your choice of Portal, you actually have two options to choose from: "Add" or "Move" - these are different actions:
"Add" does several things:
It adds the content to the specific Portal (belonging to a specific Company)
It adds the content to "Content" in Portal Manager, from where it can be used in future in Portal Templates and other Portals
The content also stays in Home - so it can be accessed outside of Portals - but the lightning bolt symbol is added to show it has been shared
"Move" is different:
It adds the content to the specific Portal (belonging to a specific Company)
The content is not added to "Content" in Portal Manager, so it's not available to add to Portal Templates / other Portals
It's also removed from your Home, so it's no longer accessible other than in the specific Company Portal chosen
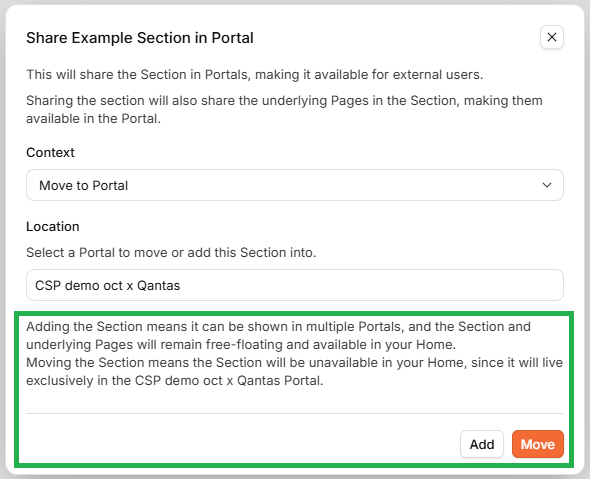
When you click "Move", you will get a pop-up box where you can review and confirm if you would like to go ahead with this option:
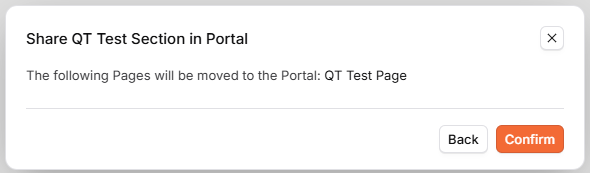
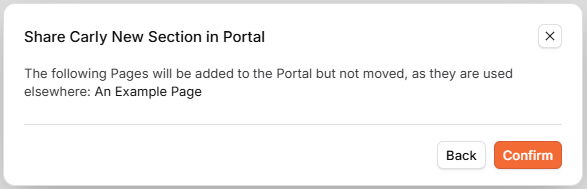
If it's not possible to completely move the content to the chosen Portal and not have it exist elsewhere (because it is already used elsewhere), the pop-up box will inform you of this:
Add to Template
This option adds the content to a specific Portal Template of your choice. (It also adds it to Portal Manager "Content", and it stays in your Home too.)
If you select this option, it will open up a new dropdown menu where you can choose from your Portal Templates.
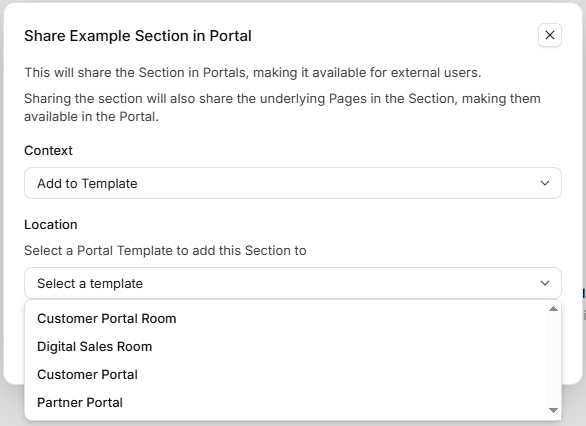
Once you've selected your choice of Portal Template, if you are sharing a Section (rather than sharing a Page) this will open up another dropdown menu - the options here reflect the two options for Sections when you're building a Portal Template:
"Sections created in Portal set-up": these Sections will be added on Portal creation, but can be removed by users
This corresponds to "Shared at first Portal set-up" in Portal Templates (see second screenshot below)
"Pinned Sections": these Sections are added on Portal creation, are fixed to the top of the Portal sidebar, and can't be removed by users
This corresponds to "Pinned to Portals" in Portal Templates (see second screenshot below)
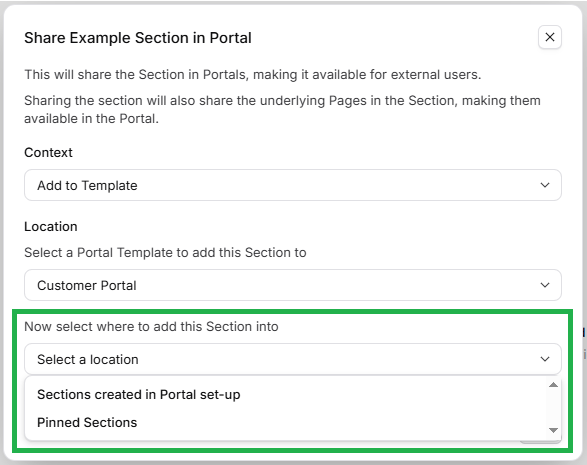
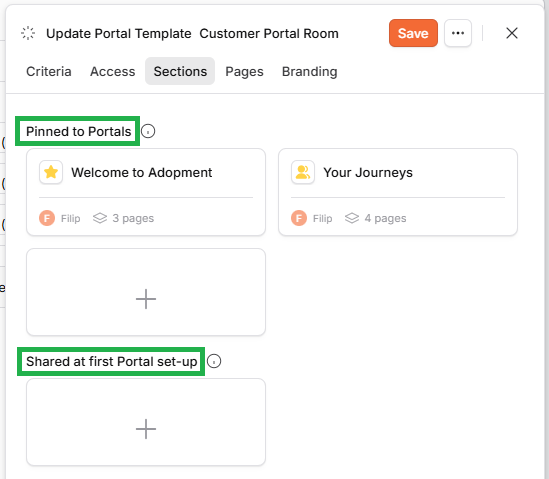
If you select the "Add to Template" option when sharing a Page, you won't get this additional option, as there's only one way to add Pages to Portal Templates.
Removing from Portal(s)
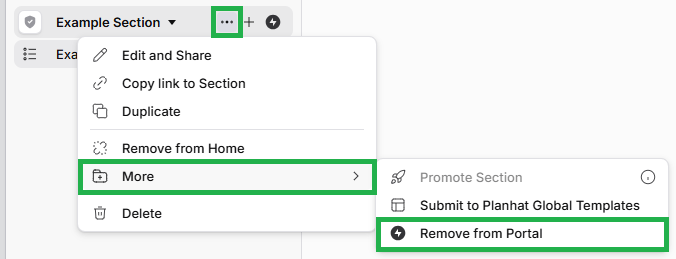
If you would like to "unshare" a Section or Page, then simply click on the ellipsis (three dots) symbol, click "More", and then click "Remove from Portal".
Section
Page
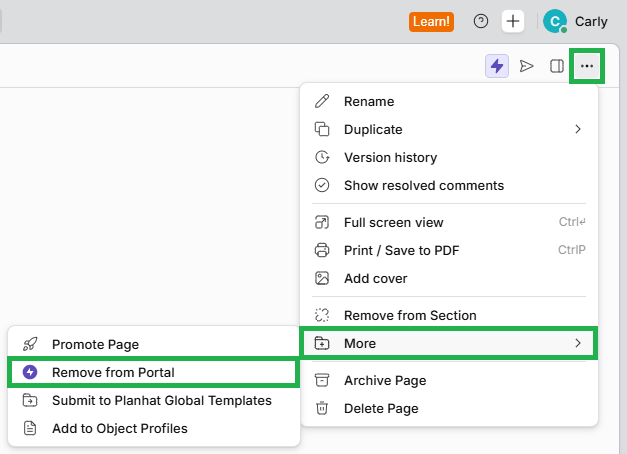
Note that if you do this for a Section, you will need to select "Remove from Portal" for each of its component Pages too.
Next steps
Now you have created your Portals content, when you are creating a Portal Template, or adding content to individual Portals, you will be able to select and add these Sections/Pages.