Preparing Snowflake and connecting the integration
Part 1 of the the setup steps for the Snowflake integration
Summary
The first stage of setting up the Snowflake integration is preparing the Snowflake warehouse and then completing the authentication in the integration in Planhat
This article takes you through the steps in Snowflake, including creating an service user
It's then easy to enter your Snowflake details in the integration and get connected - we show you how
Who is this article for?
Planhat users who are setting up the Snowflake integration (e.g. Tech/Ops)
Series
This article is part of a series on the Snowflake integration:
Setting up the Snowflake integration - an overview
Preparing Snowflake and connecting the integration - part 1 of the main instructions ⬅️ You are here
Data mapping in the Snowflake integration - part 2 of the main instructions
Article contents
Introduction

Planhat's Snowflake integration makes it easy for you to sync time-series usage data into Planhat, and sync CRM data (Company, End User and License etc.) bidirectionally.
There are two main stages to setting up the Snowflake integration.
The first stage, described in this article, is preparation in Snowflake and authentication in the integration in Planhat. The main steps we'll go through here are:
A. Setup steps in Snowflake: preparing the Snowflake warehouse
Create a service user and a role for it with the necessary permissions
Generate the necessary keys for authentication and assign them to the service user
Create a database and schema if they don't exist yet
Create a default warehouse and give the role access
Create a files stage and grant permissions
For CRM data, activate "change_tracking" for the tables or views
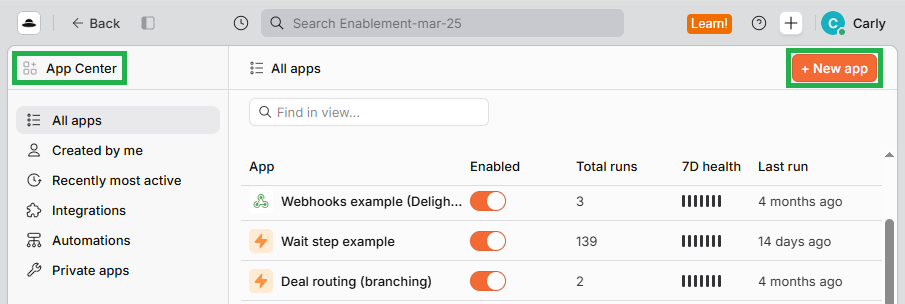
B. Connecting Snowflake to Planhat - in the Snowflake integration in Planhat:
Enter the Snowflake authentication information, and click "Authenticate"
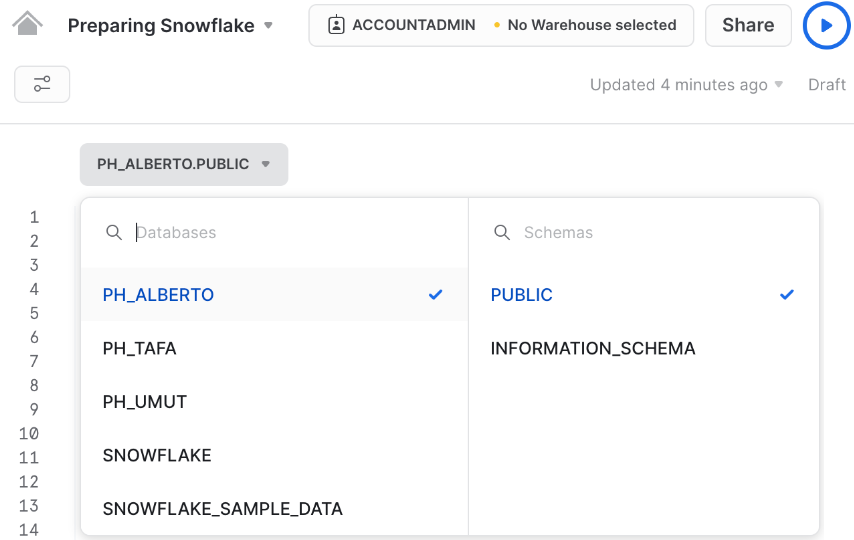
Enter your service user in the "User" box, and then select your warehouse, database and schema from the dropdown menus
The next stage is data mapping, which we cover in the next article in the series.
📌 Important to note
Previously, the instructions in this article involved a "person"-type Snowflake integration user authenticating via OAuth and a password. Due to security enhancements in Snowflake, the recommended method is now via a "service"-type user and key-pair authentication, so the main instructions below now describe this method.
At the end of this article, we also include instructions for converting existing Snowflake integrations from the person/OAuth/password setup to the service/key-pair method, if you already set up your integration and would like to switch, as we recommend. The older method not only requires intermittent manual reauthorization when refresh tokens expire (every 90 days by default), but Snowflake's upcoming (at time of writing) security policy changes will also enforce setting up multi-factor authentication (MFA) methods for this user type, which makes this authentication method less straightforward.
Setting up a new Snowflake integration, with a service user and key-pair authentication
A. Preparation steps in Snowflake
Before you can connect Snowflake to Planhat's integration, there are some steps to carry out in Snowflake to prepare the Snowflake warehouse.
Make sure you have Snowflake admin access before carrying out the following steps.
B. Authenticating the Snowflake integration in Planhat
Now you've prepared Snowflake, you can connect it to the integration in Planhat.
You are now ready to start the data mapping, which we go through in the next article.
Next steps
If you experience any issues in the authentication/setup steps in this article, check out our troubleshooting advice here
Once you've followed the instructions in this article and connected Snowflake to the integration in your Planhat tenant, the next step is to configure the data mapping. Learn how to do this in our next article in the series
Migration from previously set up person user and OAuth to service user and key-pair authentication
Previously (before July 2025), when you set up the Snowflake integration in Planhat, the only option to authenticate was through through OAuth and a password with an integration "person" user. This setup not only requires intermittent manual reauthorization when refresh tokens expire (every 90 days by default), but also Snowflake's upcoming (at time of writing) security policy changes will also enforce setting up multi-factor authentication (MFA) methods for these person users, which makes this authentication method less straightforward.
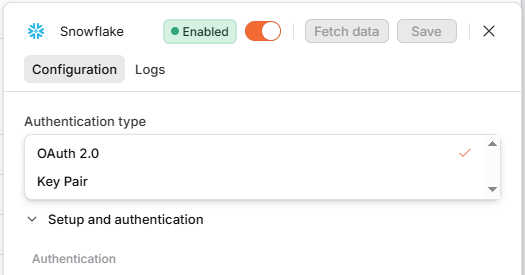
If you already set up the Snowflake integration using the older method, we recommend that you migrate from OAuth to the new key-pair authentication method. The instructions below guide you on how to do this. You will note there are some similarities with the method we described above for setting up key-pair authentication from scratch.
Make sure you have Snowflake admin access before carrying out the following steps.
🚀 Tip
If you need any further help with this, you can reach out to your Technical Deployment Specialist (TDS; formerly called TAM).