Sharing your Page with your audience
How to share your Page, both internally and with customers
Occasionally, you might create a Page just for you, to analyse something specific. But usually, your Page will be too good to keep to yourself. You’ll want to share it, and tell data stories to a wider audience, so others can also take action from data, or understand the results of the actions you have taken.
Here we’ll talk through different ways you can share your stories. Who your audience is will influence how you can share your Page:
Share data internally - Share the URL link to your Page or present straight from Planhat
Share data with a Board member - Give them access with a personal password protected link
Share data with a Customer - Share a Page on the Customer portal
Share data internally
Share a URL link to your Page
As a Planhat admin, you’ll create a variety of Pages for your colleagues to use. Pages could range from a CSM portfolio dashboard, to a data hygiene dashboard, to an invoicing dashboard, to a references database, etc. Remember that as Planhat subscriptions are not based on the number of seats, anyone in your org could get access to Planhat & these Pages, not only the CS team!
So how can you give a team member access?
A. Make Page visible for any team member by making it Public
First, you'll have to set the Page as public - meaning other Planhat users can see it. To do this, hover over the Edit button or “Page ▼” and select “Share with team”. Now, if you share the URL of that specific Page with your team members, they will be able to see it.
B. Make Page visible for a specific team or team member by adding it to a Folder
Sometimes, you want to share a Page with only specific people. The easiest way to do this is to drag and drop the Page in a Folder. Not only does this keep your Pages organised and make it easier for your colleagues to navigate to the Pages that are important to them, but Folders also allow you to set the visibility of the Pages inside by sharing the Folder itself with a specific team, team member or everyone.
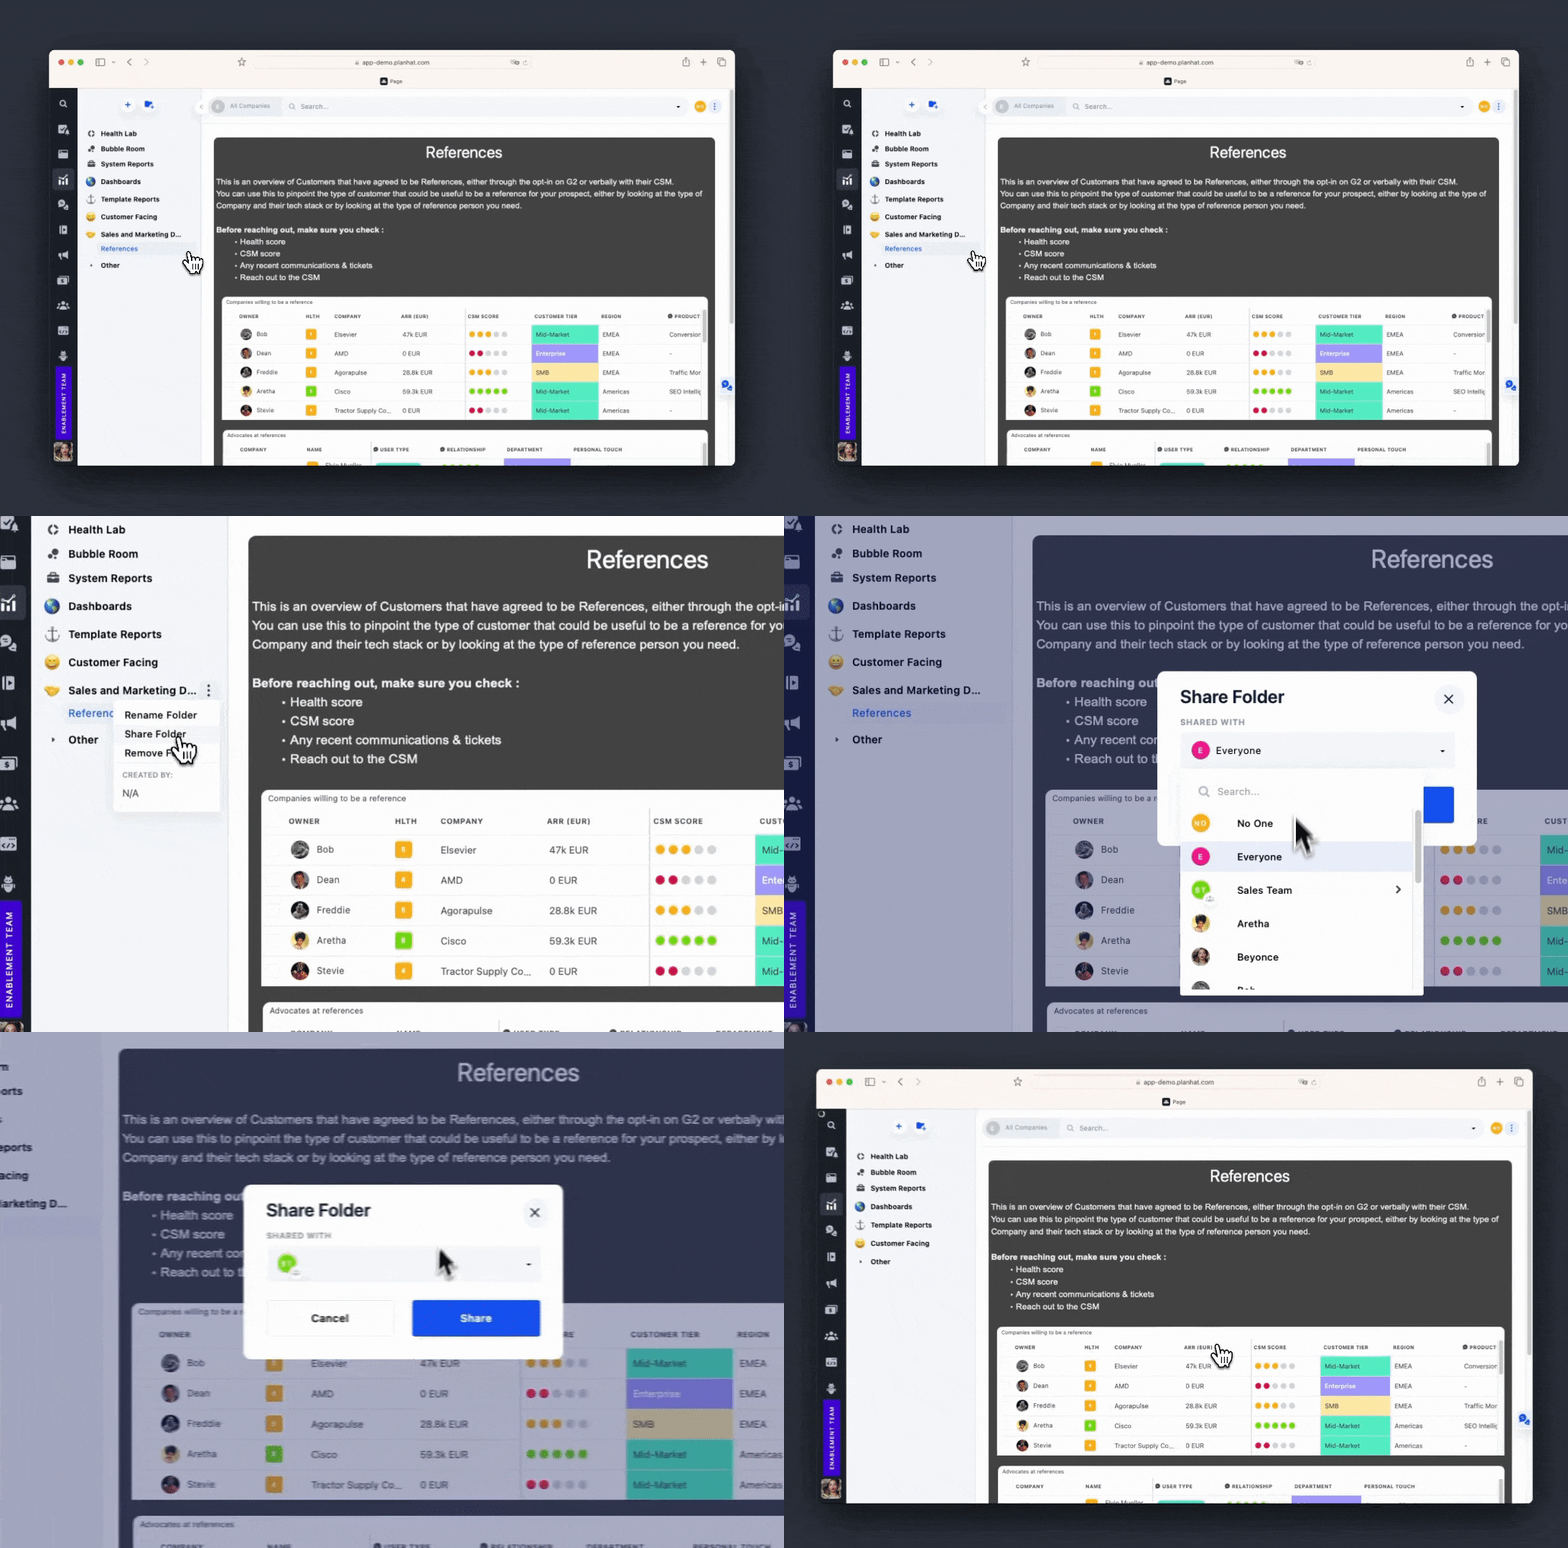
In both these situations, once you've set up the correct access, you can simply share the URL with the team member, and they will be able to see the Page.
Present straight from Planhat
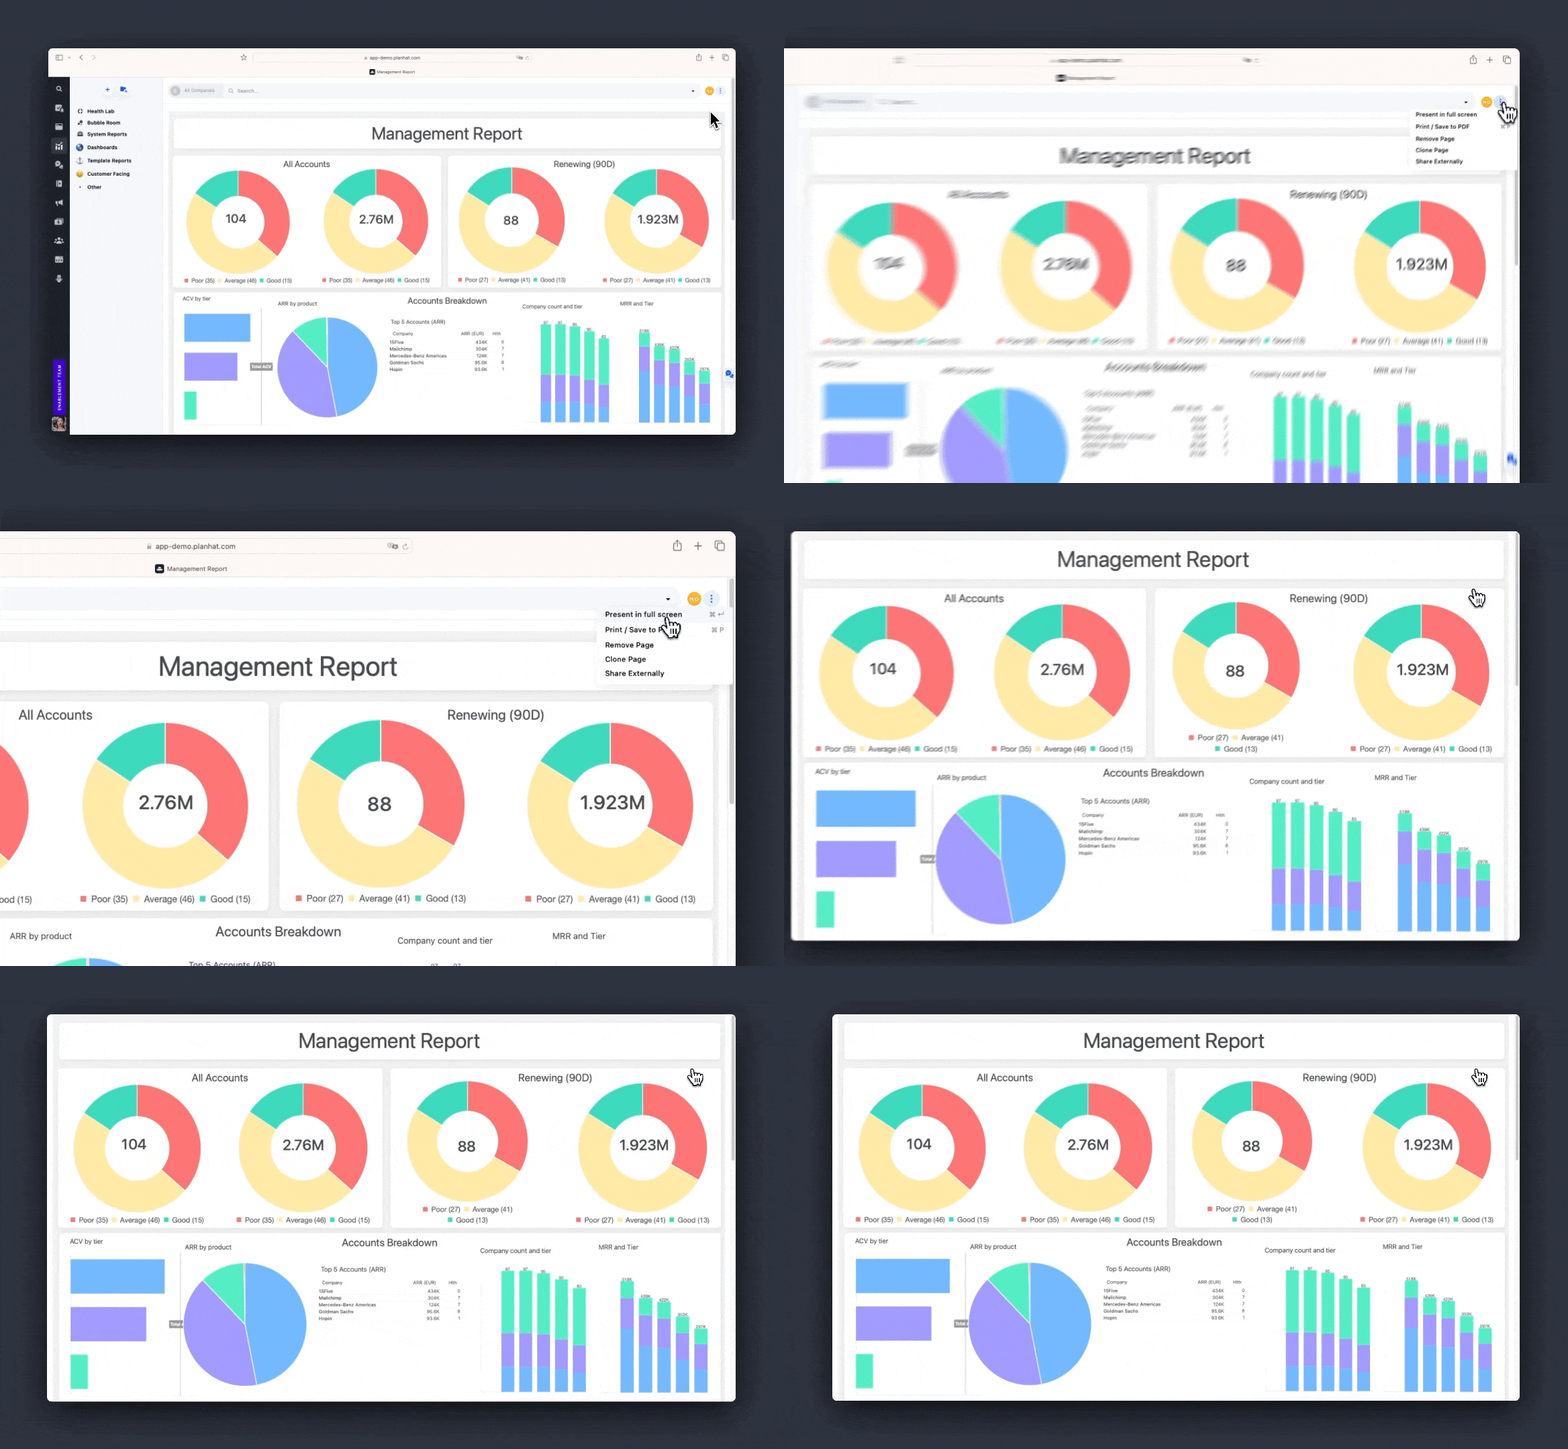
Another simple way that you can share stories within your organisation is to present your Pages straight from Planhat in full screen, typically as slides.
Think about the slide decks you have for standard meetings, such as a Monday Morning Meeting with your team, or monthly management updates. By building these decks in Planhat, the presentations automatically pull in live data, which is really cool. This means more exciting presentations for your audience, achieved via minimal effort from you - you don’t need to manually update the slide deck each time!
So how do you do this?
Once you’ve created a Page, it’s easy: just hover over “Page ▼”, and then click “Present in full screen”. If your Page is in presentation format, you can use your arrow keys to move between the slides. If your Page is a canvas, you can scroll down if necessary to see all your content. Press your “Esc” key to leave the full-screen format.
Share a password-protected link, e.g. with a Board Member
Occasionally, you might want to share a Page with colleagues who don’t log into your Planhat tenant - for example, sharing business results with your Board Members.
The best way to do this is to share a personal password-protected Page via a link. This ensures you get to share your data in a protected way with view-only access. You can even set an expiry date and a view limit, for extra security.
So how do you send them this password-protected link?
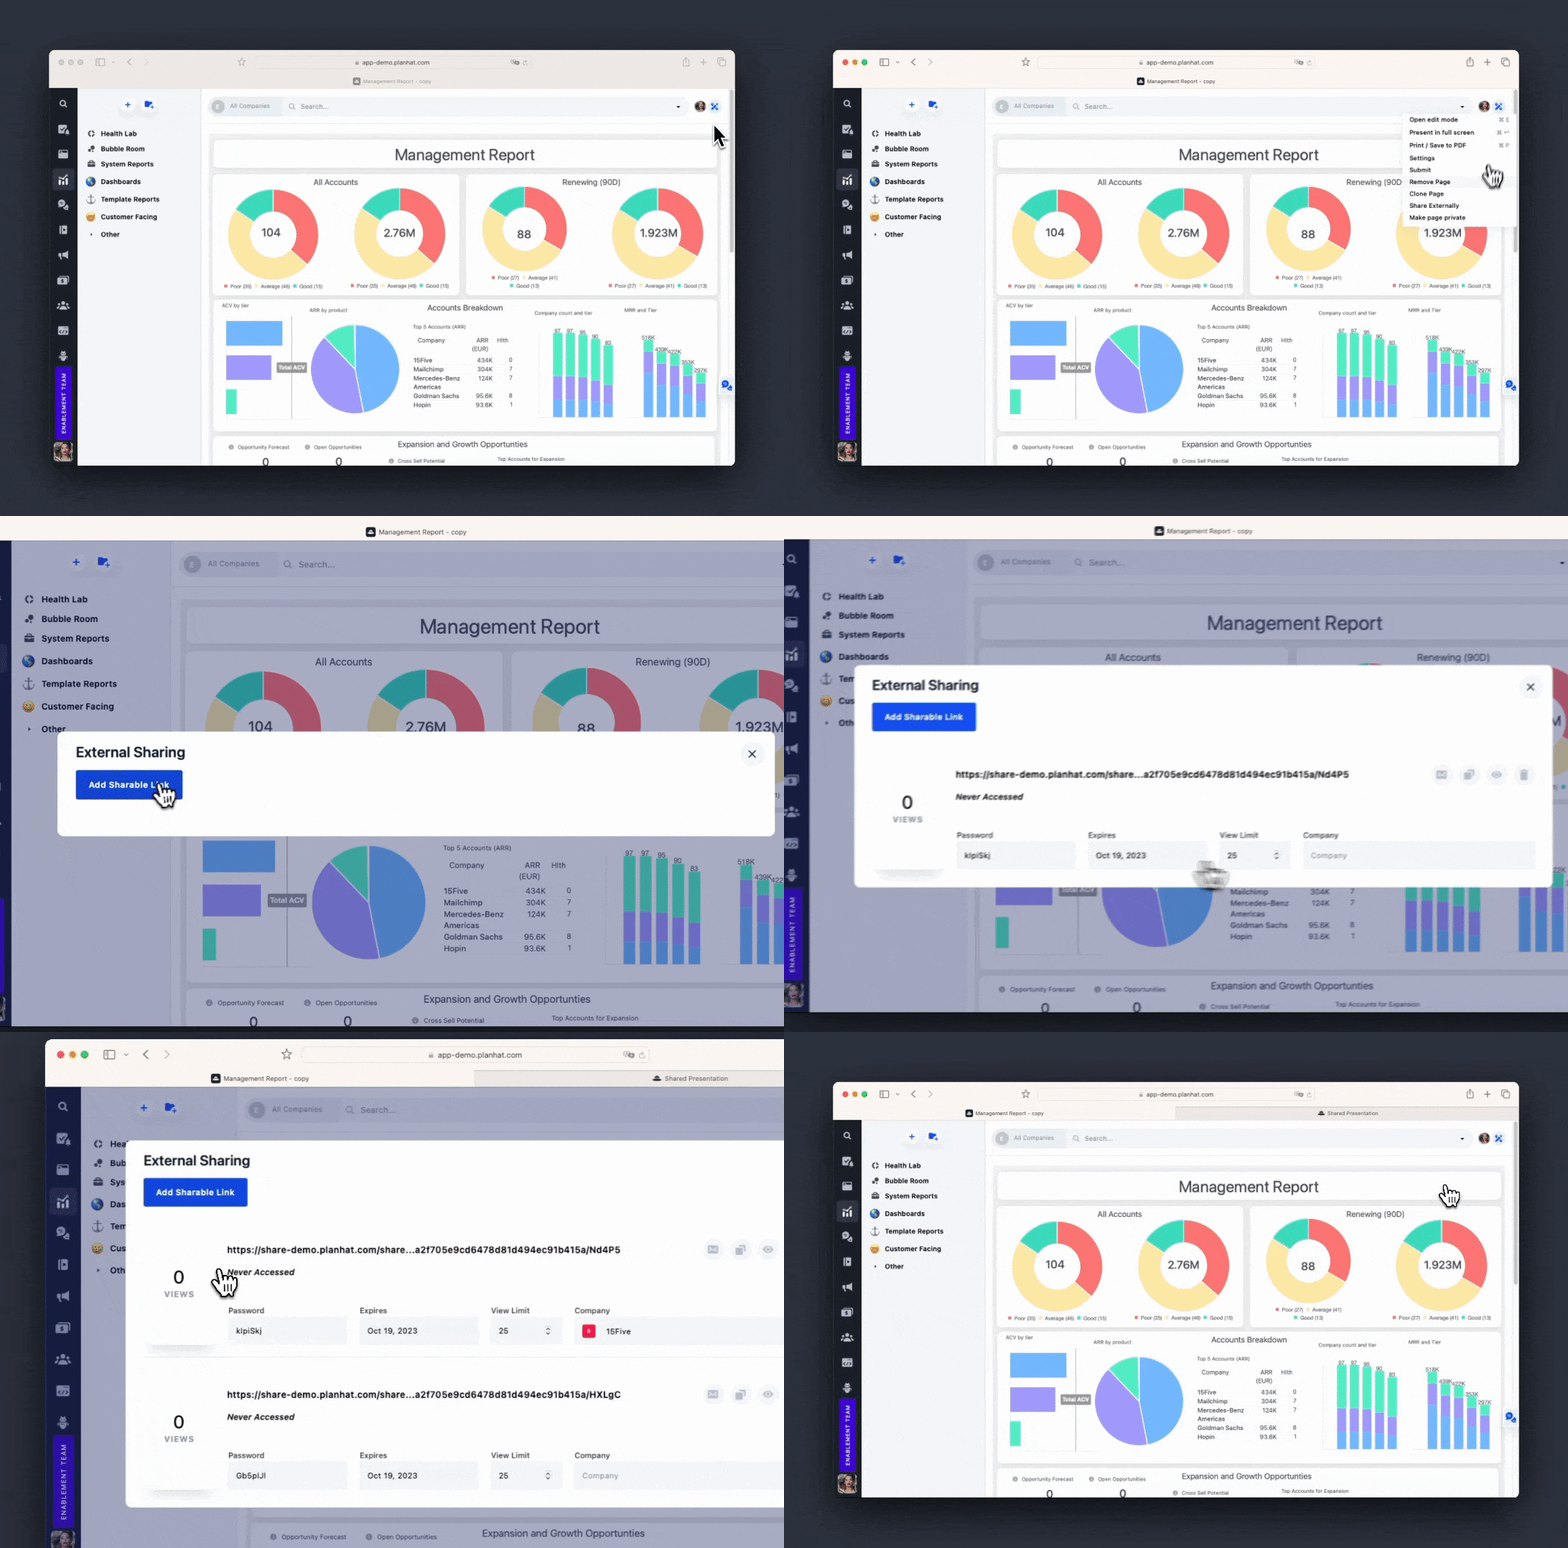
When in edit mode for the Page, click on “Page ▼”, select “Share Externally” and click “Add Sharable Link”. Add an expiry date and a view limit, if you'd like. This creates a personal link that you can share with a specific person.
If you need a second link, just click “Add Sharable Link” again and it will add a new link below, with all the same configuration options and sharing options. You'll also be able to see whether the Page has been viewed in detail.
Share data with a Customer via the Customer Portal
Customer Portals are a great way to communicate with your customers, via a shared space where you can collaborate. One way to do this, is via Pages that you can share with your customers directly on the Portal.
Typical examples include:
A Welcome Page to introduce your organisation and your product, complete with instructions and videos etc
A Usage Insights Page to show your customer how they are using your product, celebrating successes and highlight any areas of improvement
An EBR or QBR deck ready to be presented to the customer
An Individual Success Plan sharing a plan with the customer detailing next steps for successful collaboration
The Customer Platform will automatically filter each of these Pages to only show the data related to that specific Company, making it really easy and secure for you to share data with your customers. Note that Pages shared to Portals can only be viewed and not interacted with.
So how do you share a Page on the Customer Portal?
That will depend on where you created the Page in the first place, i.e. the Customer Intelligence Module or as a tab on a Customer Profile.
A. Your Page is built in the CI module
To share a Page you’ve built in the CI Module to the Portal, there are two steps:
Make sure your Page settings are set up correctly: In edit mode, click on “Page ▼” and then “Settings”. Turn on the toggle switch “Enable for sharing on Customer Portals”
Add the Page to a specific Customer Portal: In the Portal, click “+ Share New” in the top left, click “Page”, and then click the “+”. Note that you can rename the Page if you'd like - this name will be visible to your customer in their Portal.
If you want to remove a Page from a Portal, simply click on the three vertical dots at the top right of the screen (next to the title, when viewing the Page in the Portal), and select “Delete”. Deleting a Page from a Portal does not delete it from the CI Module.
Once a Page from the CI Module has been shared to a Portal, if you go to edit that Page in the CI Module, you’ll see a red “i” symbol with a tooltip explanation that “You’re now editing a central template”. If you make changes to the Page in the CI Module, those changes will be reflected in all the Portals with that Page, the next time they are loaded. This is a really quick way to distribute an update to multiple Portals, but it’s important to be aware that your change will have these widespread effects.
B. Your Page is built on the Company profile
If you’ve created a Page as a tab for Company profiles (Customer 360s), you can share it to the Customer Portal following these steps:
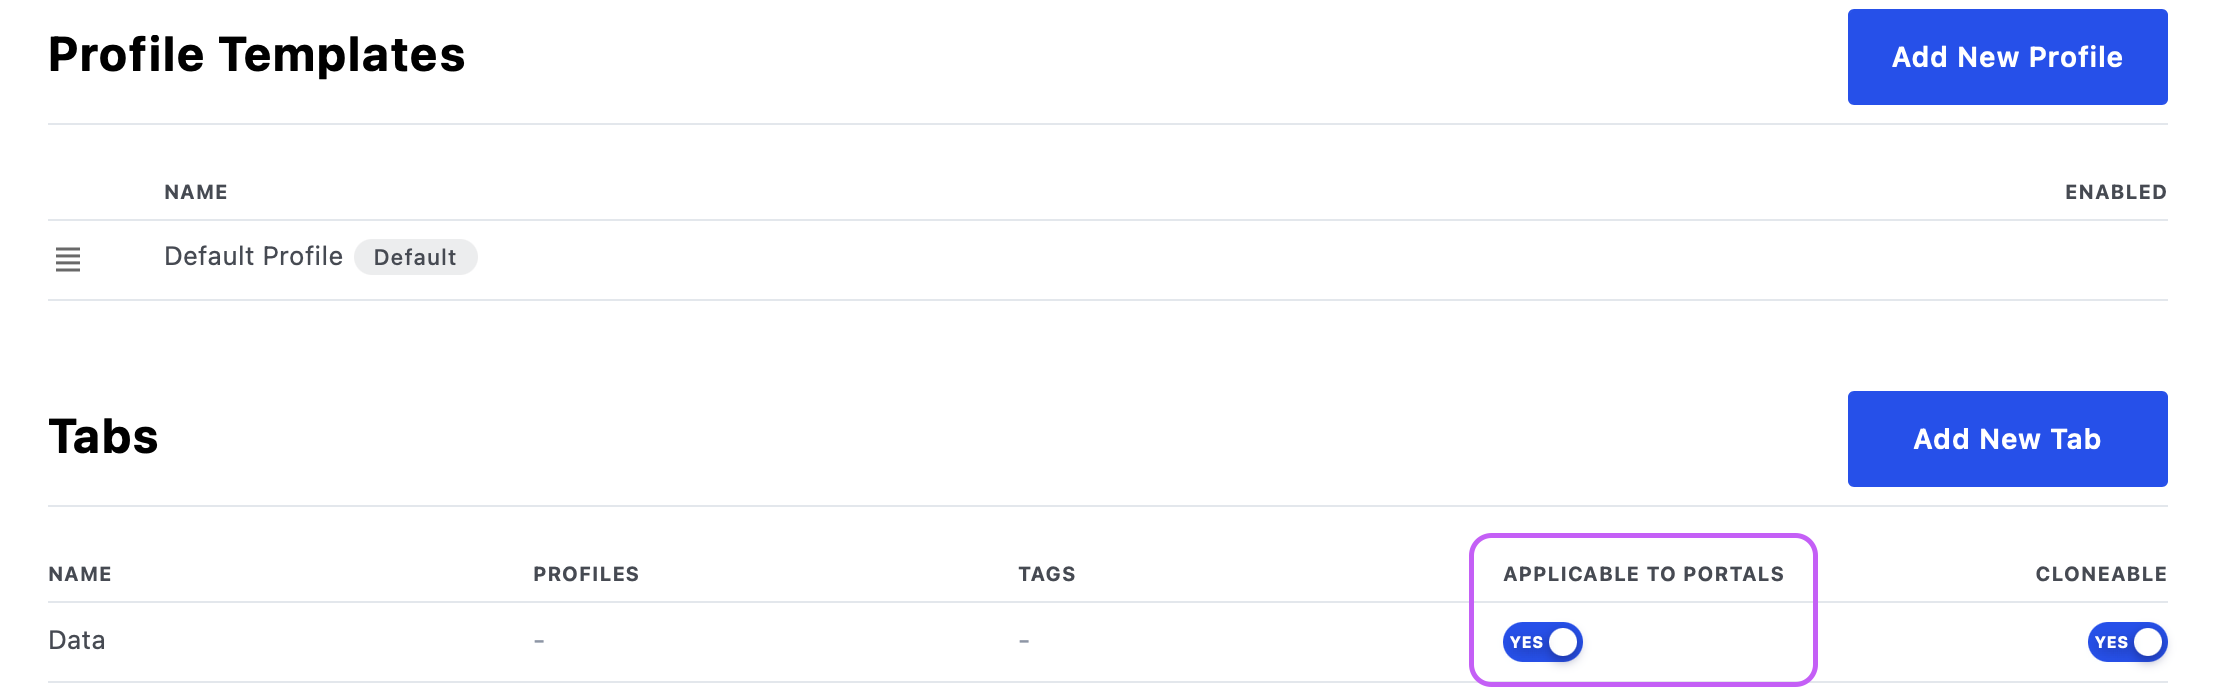
To remove a Page from a Portal, simply toggle the Portal icon back to grey.
And that's it! Go forth and share your Page! 🚀