Custom Automations
You can design Custom Automations if you want to automate processes that aren't covered by Automation Templates
Summary
Automations enable you to automate actions in Planhat, using the general structure of "if x happens, do y"
As well as being able to choose from a library of customizable Automation Templates that cover some common use cases, you can also build Automations that are completely custom
Custom Automations enable you to design a wide variety of processes, to meet your organization's needs - you choose what should cause the Automation to run (e.g. a change in data, a manual action or a schedule), and then which steps should be carried out
You have a lot of choice when configuring Custom Automations, including branching, wait steps, function executions, webhooks, and so on
Custom Automations are charged through Automation Credits
Who is this article for?
Planhat Users who are building Custom Automations for their organization (e.g. Tech/Ops)
Series
This article is part of a series on Automations:
How to choose between Automations and other Planhat features
Custom Automations ⬅️ You are here
Article contents

What are Custom Automations and why use them?
In our Automations Overview article, we explain how using Automations is one way in which actions can be automated in Planhat. Automations have the general structure of "if x happens, do y", and can either be simple or more complex if required.
Planhat includes a library of pre-built - yet customizable - Automation Templates that cover a wide variety of common use cases. But if you need an Automation to carry out a process that's not covered by an Automation Template, then you can create a Custom Automation instead.
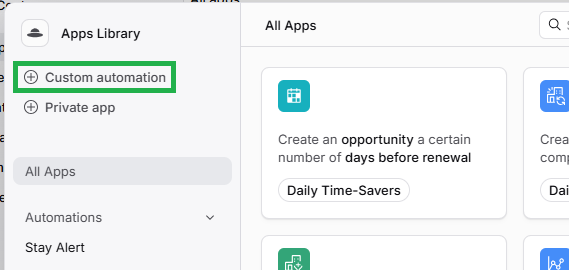
Custom Automations in upgraded Planhat (ws.planhat.com) have a flowchart UI, making it easy to visualize and understand the whole process - this can be particularly helpful if you have a multi-step, potentially branching, Automation.
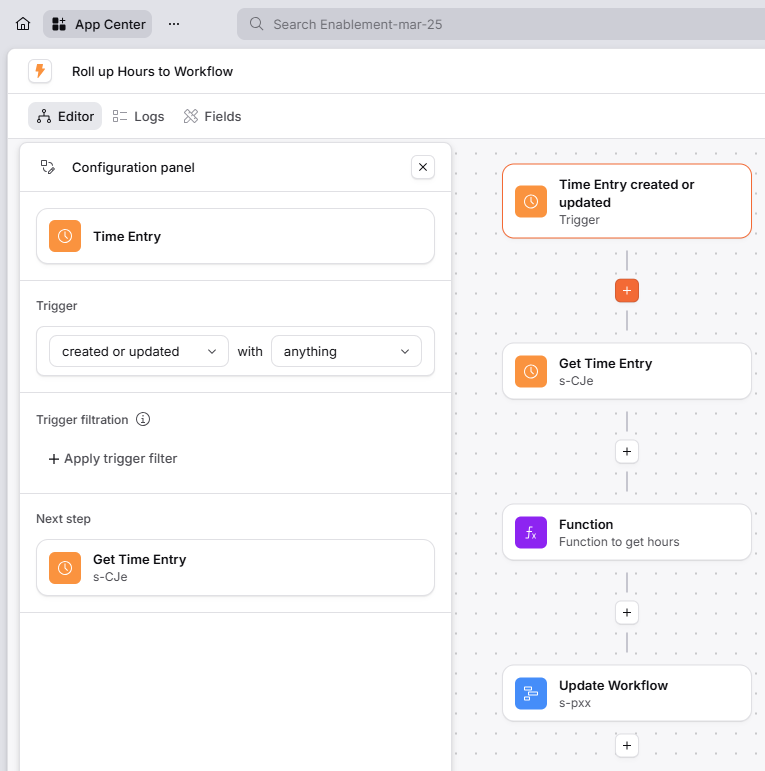
Click the image to view it enlarged
Even Custom Automations can be relatively simple - perhaps your process is straightforward but it simply isn't common enough to be included in the library of Automation Templates - but they can also be more advanced. It's possible to have branching, run JavaScript functions, be scheduled, be triggered by an incoming webhook, call a webhook as a step, and so on. In this article, we will give you an overview of the steps to create a Custom Automation.
📌 Important to note
You should always start by checking whether there is an Automation Template in the Apps Library for your use case before you begin creating a Custom Automation. It's quicker and easier to create a Templated Automation if possible.
🚀 Tip
As of November 2025, it's now possible to create Custom Automations from Automation Templates, rather than only being able to create Templated Automations from them, and always needing to build Custom Automations from scratch. You can read more about this here.
📌 Important to note
If you want to create a Custom Automation, you can consult your Technical Deployment Specialist (TDS) if you need technical assistance. Our Support team are also available to help with troubleshooting.
How to set up a Custom Automation
📌 Definitions
Model - Planhat data models are Company, End User, License, Opportunity, and so on. You can think of them as like containers for data
Record - data within those models - e.g. if Company is the model, then BMW, Microsoft and Nike could be records; and if End User is the model, then Katie Chambers, Jason Bendefy and Sally Peters could be records
We'll begin with the main method of creating Custom Automations: building from scratch.
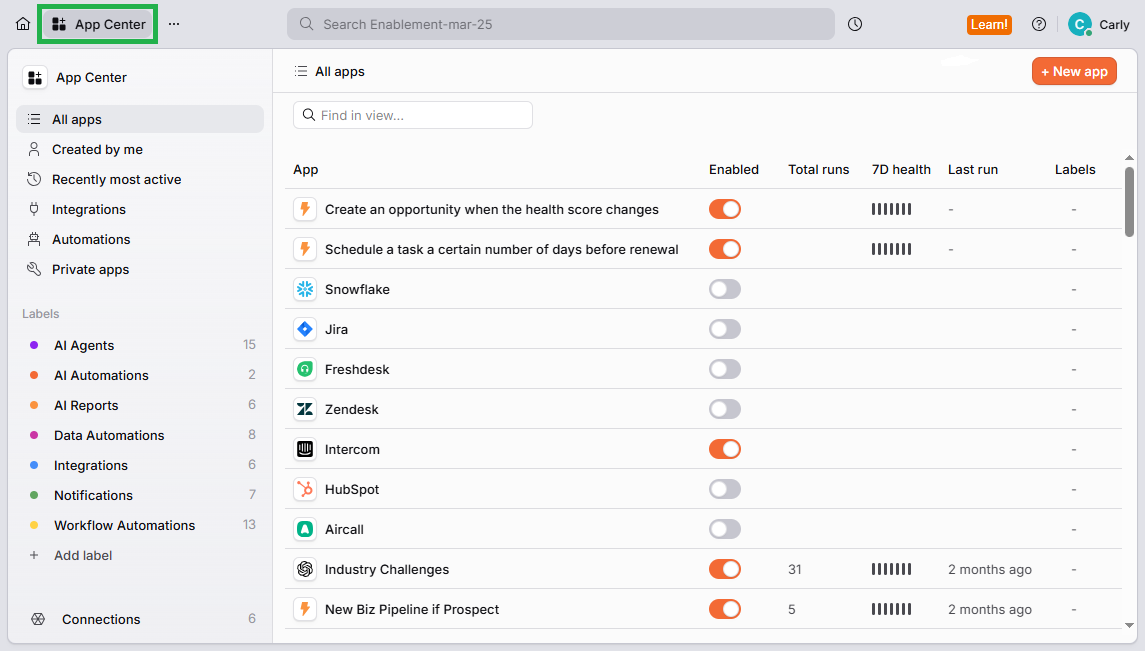
How to create a Custom Automation from an Automation Template
While the from-scratch method described above is the main method for creating Custom Automations, and is suitable for any Custom Automations, from November 2025 it's also possible to create Custom Automations from some Automation Templates. This means if you would like to create an Automation that's very similar to one in an Automation Template, but you require more customization than is available via the dropdown boxes etc. in the Template's sentence-structure UI, you can instead convert it to a Custom Automation that you can then edit.
This is also useful if you simply want to look "behind the scenes" at an Automation Template, to give you some inspiration for when you are building your own Custom Automations. For example, if you would like to see examples of AI Automations (with "Use AI" steps), you could open up an AI-related Automation Template and then click to see the prompts used etc.
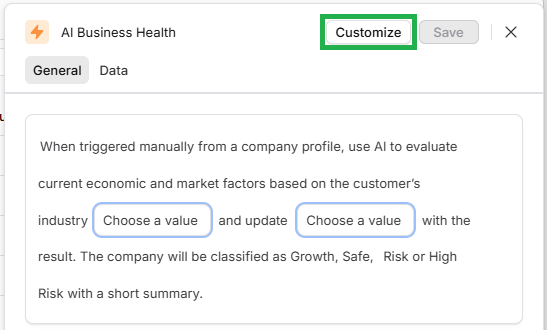
This functionality is available for some (but not all, at time of writing) Automation Templates. You can identify the applicable Automation Templates via the "Customize" button (example shown below) that you click to open up the Template as a Custom Automation. You can read further details/instructions here.
Practical tips for building Custom Automations
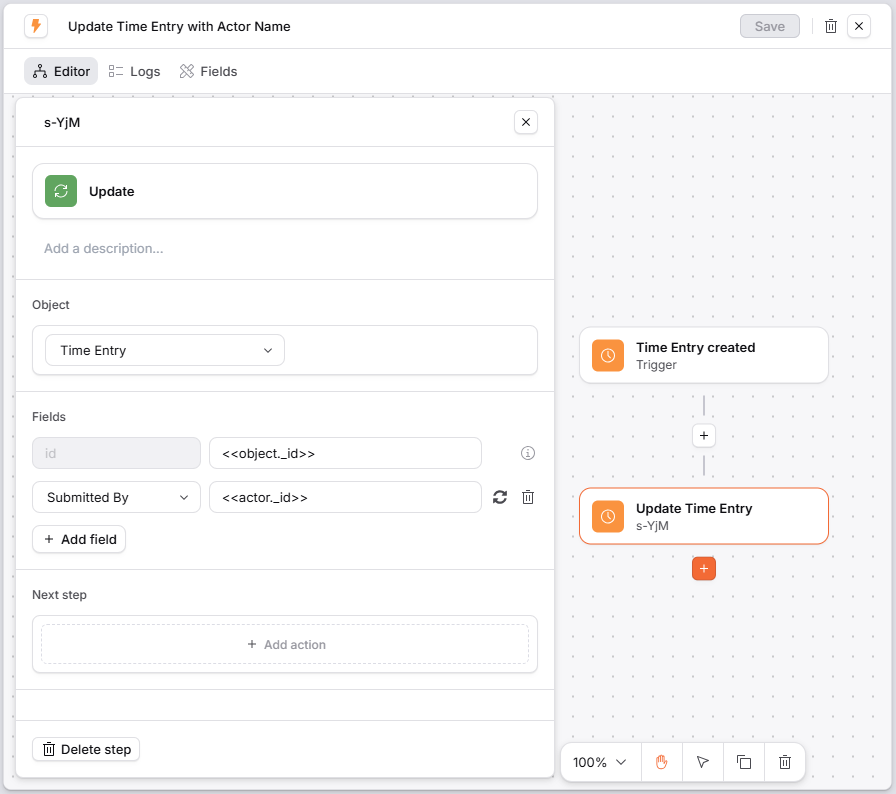
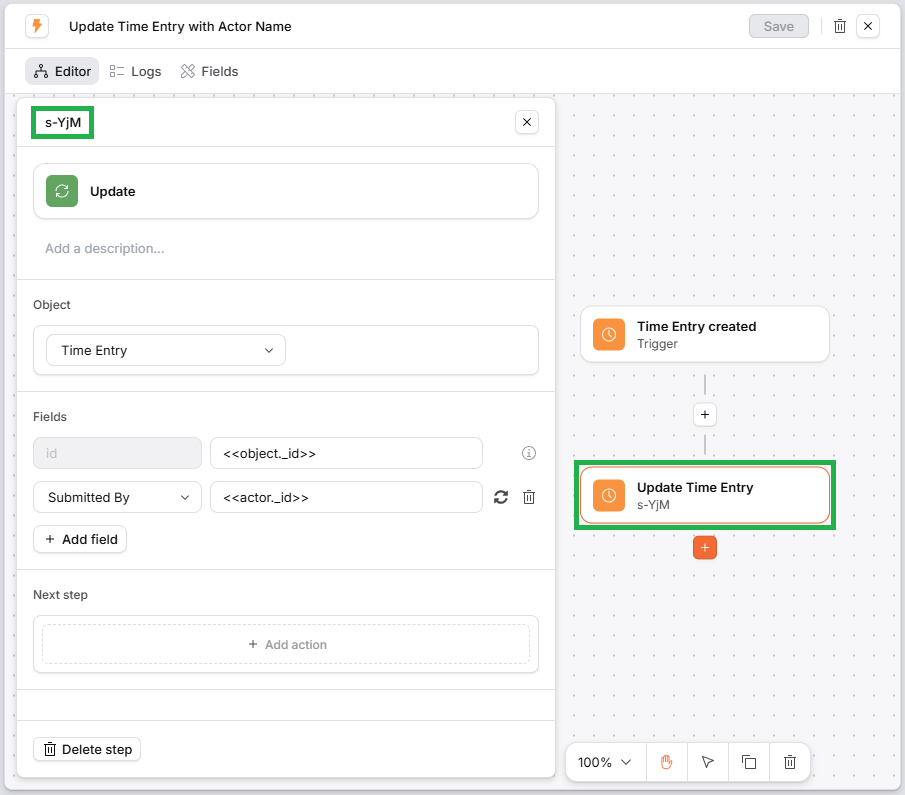
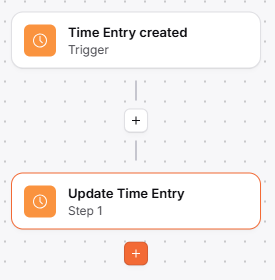
You can click on any step (including the trigger) in the flow chart to open up the "configuration panel" for that step on the left-hand side, to view/edit it. You can identify the selected step in the flow chart by the orange ring around it (e.g. shown in the "Update Time Entry" step below)
Click the image to view it enlarged
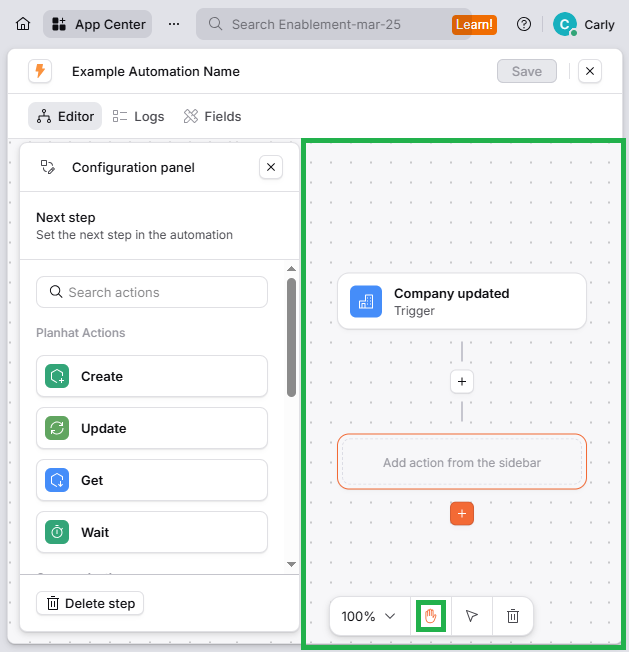
Ensure the hand is selected at the bottom of the flow chart, and then you can move it around by dragging and dropping - useful for positioning it as needed
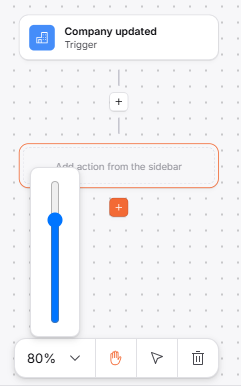
If you end up building a large flow chart (and/or have a small screen) and would like to zoom out, you can use the percentage slider at the bottom of the flow chart
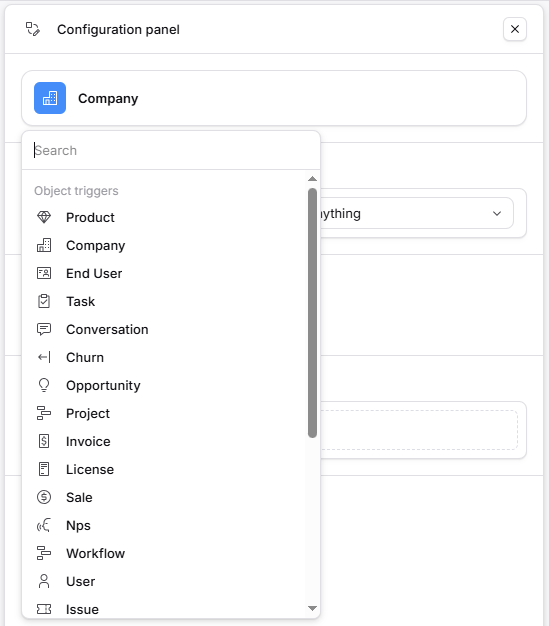
Once you've selected the type of trigger or step (e.g. "Create"), if you then want to change it to something different, you can do this by clicking back into the trigger/step type to open up the options as a dropdown menu. (Clicking the "x" in the top right does not go back a step, it just closes the configuration panel)
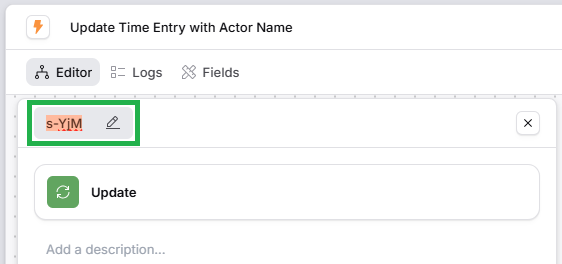
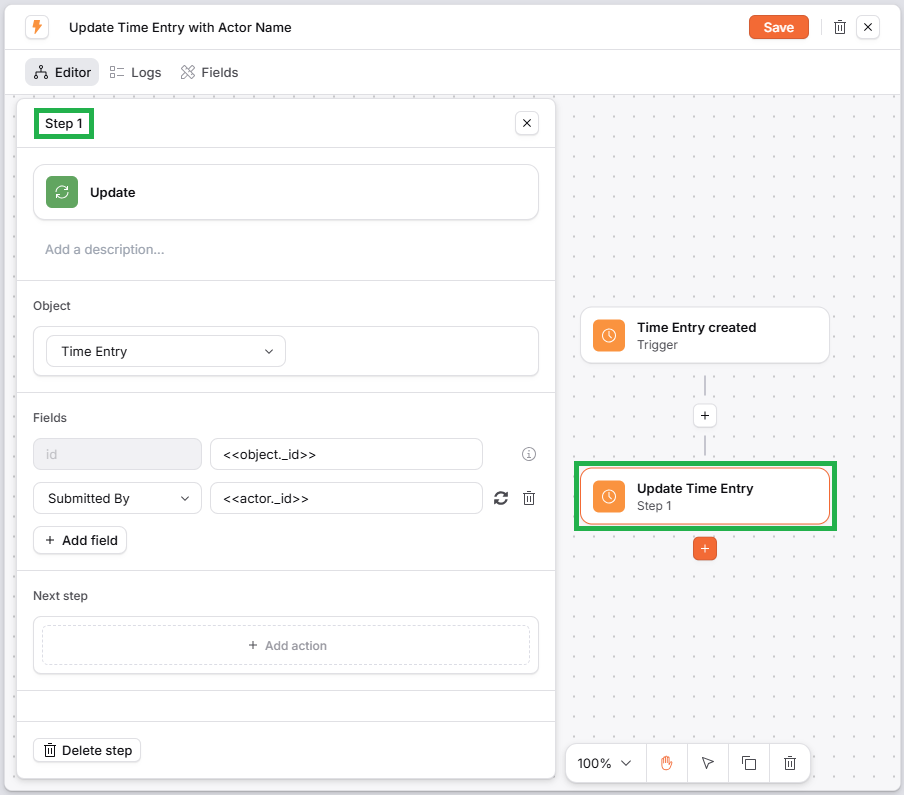
Steps (so here we are talking specifically about action steps, rather than including the trigger too) are automatically assigned a random name, such as "s-YjM" in the screenshot example below. This is because, with the option to branch your process, there isn't an obvious "Step 1" and "Step 2" like you may have been familiar with from the previous Planhat Automation UI. This means that in any replacement codes (see more here), you will need to refer to this specific name. Or if you would like to use your own choice of name for a step, you can click into the name in the top left of the configuration panel, and type in your preferred name
Click the image to view it enlarged
Click the image to view it enlarged
If you want to add a new step ...
...as well as clicking "+ Add action" under the "Next step" at the bottom of a configuration panel, as described in the instructions earlier in this article, and shown in the screenshot immediately above ...
... you can also click on the "+" symbols in the flow chart - just click on the "+" in the position you'd like to add the step. This is a particularly useful method if you want to add a step in the middle of two existing "blocks" in the flow chart
If you would like to delete a step, simply ensure the step is selected (i.e. it's showing in the configuration panel on the left) and then click "Delete step" at the bottom, or the trash can (rubbish bin) icon to the bottom left of the flow chart, both highlighted below
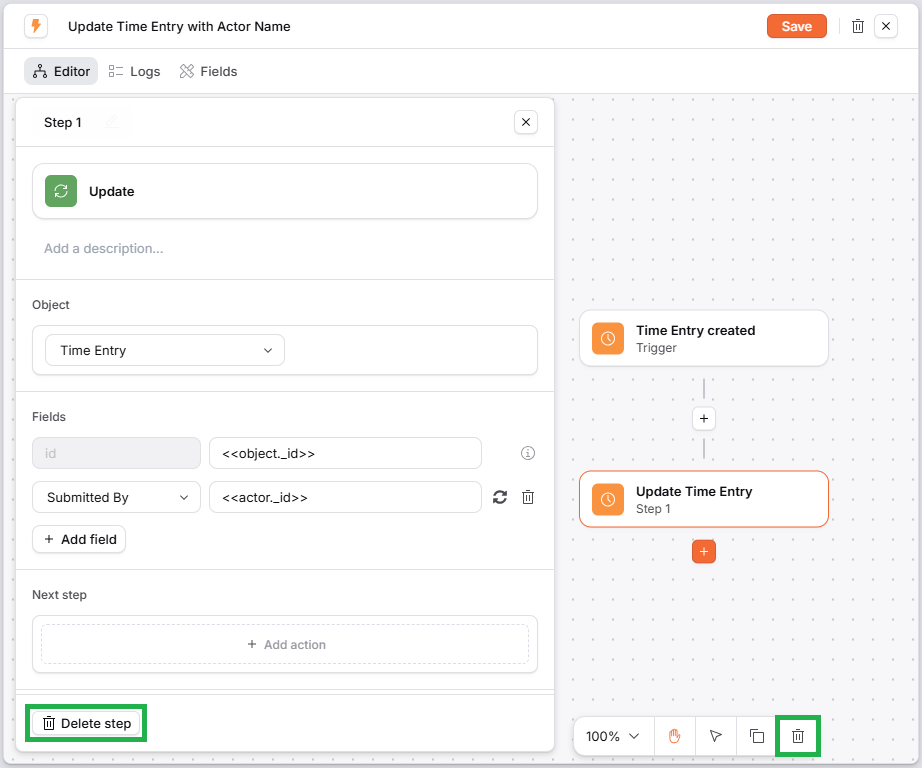
Click the image to view it enlarged
As we mentioned earlier, as an alternative to creating a Custom Automation from a blank slate, you can also open up an applicable Automation Template and then convert it to a Custom Automation
In the "Data" tab when you're configuring an Automation, you will see an option for "Task execution limit" (see first screenshot below)
This refers to the number of Automation steps (of this Automation) that can run in 30 days - a "step execution limit". This is evaluated once a day at 12 noon UTC. So, for example, for an Automation with 2 steps, if you set the limit to be 10 step executions, each time the Automation runs that counts as +2, so it could run 5 times before it reaches the limit
You can enter a number here as a precautionary measure, to prevent an Automation from running "too many" times (in the context of tenant-wide Automation run limitations and credit limits)
An example use case might be an Automation that's triggered automatically (in response to a change in data) and that has an AI step
If your Automation reaches a limit set here, you will see a symbol of a triangle with an exclamation mark in the App Center next to the Automation, and if you mouse over this you will see this tooltip message with an explanation and solution: "This automation has exceeded its task execution limit for the last 30 days. To re-enable it, please increase the limit." - as shown in the second screenshot below
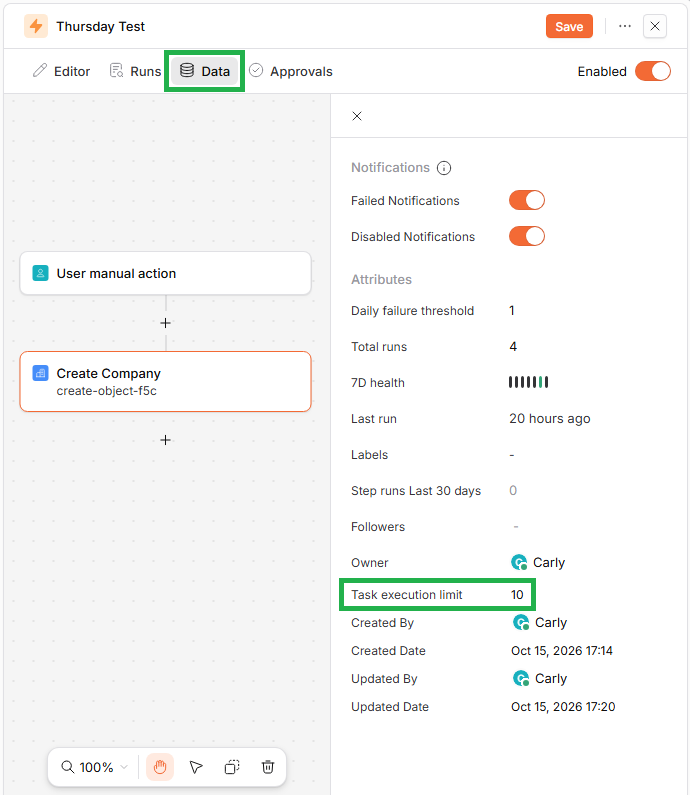
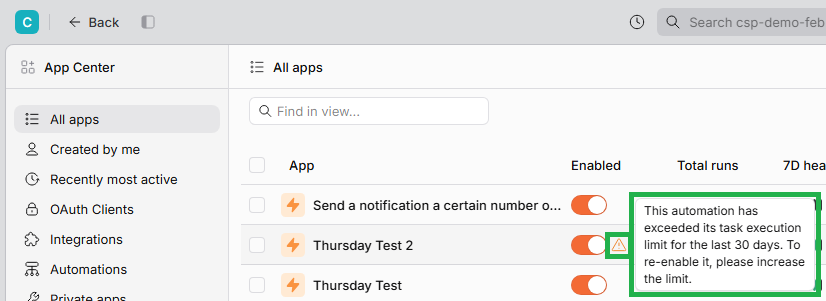
Click the image to view it enlarged
Commercial considerations for Custom Automations
Custom Automations are charged based on Automation Credits, where each Automation run consumes a number of Automation Credits. The number of credits charged per run depends on the number of steps in the Automation.
Your organization's Planhat tenant (instance) will have a particular monthly quota of Automation Credits, depending on which Planhat plan (subscription) your organization is on.
Most step types consumes one Automation Credit when they are run - e.g. a Get step counts, and an Execute Function step counts. However, the following steps do not consume Automation Credits:
Triggers (what initiates the Automation)
In addition to consuming Automation Credits, AI steps consume AI Credits, unless you're using your own AI connections.
Examples
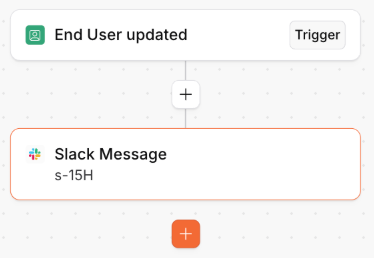
Permissions within Custom Automations
There are a number of permissions that apply to both your overall tenant (your organization's copy of Planhat) and your individual User Role, and control access to Custom Automations and their steps.
As well as the wider permissions (a workflow permission for the App Center, and a set of data model permissions for the "Automation" system model), more specific permissions control access to particular trigger types and step types within Automations.
Firstly, note that there are a series of workflow permissions:
Automation Actions - Raw JS function
Controls access to "Execute Function" steps
Automation Events - Call a Webhook
Controls access to webhook triggers and steps
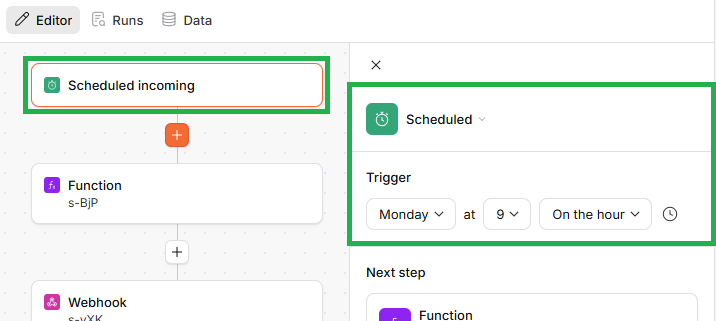
Controls access to the "Scheduled" trigger type (shown below)
In addition to this, standard data model permissions apply within Custom Automations - the ability to create Companies, or update End Users, and so on.
These permissions in Roles can affect you (as a Planhat User) in two main ways when it comes to Custom Automations. If you don't have the relevant permission turned on for your Role:
Firstly, when building a Custom Automation, you won't be able to select an option you don't have access to (e.g. you can't add an "Execute Function" step if you don't have the "Automation Actions - Raw JS Function" workflow permission enabled for your Role). Options you don't have access to won't show in the list for you to select from when configuring an Automation
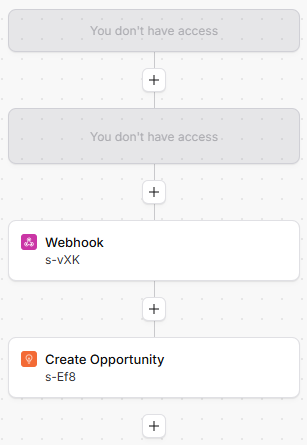
Secondly, if a colleague with more permissions has created a Custom Automation (or you made a Custom Automation in the past, and your permissions have since been reduced), when you view that existing Custom Automation, any trigger/step you don't have permission for will not be available for you to view or edit - you will instead see a grayed-out box with the message "You don't have access", like in the example screenshot below. Remember, this includes data model permissions too (e.g. to see the bottom step below, you need permission to create an Opportunity) as well as the workflow permissions we discussed
Additional resources
We have a training video on Custom Automations - check it out here:
If you'd like to deep-dive into some Custom Automation use cases, as well as our worked examples article, we have two guides:
Build a Custom Automation - timestamp milestones in the customer journey
Build a Custom Automation - archive Workflow when completed